Garden fencing solves everyday problems like privacy from nearby windows, keeping pets safely in the yard, and framing your beds so the landscape looks intentional. With a bit of planning and the right tools, you can build a simple fence that adds security and real curb appeal without hiring a contractor. This guide helps you make smart choices on style, height, and materials so your fence looks good and lasts.
Key Takeaways
Contents
- With careful planning, accurate measurements, and solid post setting, building garden fencing becomes a manageable weekend project that delivers privacy, safety, and curb appeal.
- Selecting climate-suited wood, corrosion-resistant fasteners, and protective finishes helps garden fencing resist rot, stay straight, and maintain a polished look over time.
- A clean layout with consistent rail heights, even picket spacing, and a properly braced gate creates garden fencing that works smoothly and looks intentional from the street.
- Verifying HOA rules, setbacks, and utility locations before digging prevents delays, avoids fines, and keeps your garden fencing compliant and neighbor friendly.
Building Garden Fencing With Wood
Build garden fencing with wood to add privacy, keep pets safe, and boost curb appeal using this practical plan that guides layout, posts, panels, and a gate you can trust.
Materials
- Cedar 4×4 posts or pressure treated 4×4 posts
- 2×4 rails
- 1×4 or 1×6 pickets or fence boards
- Exterior coated or stainless screws
- Gravel
- Fast setting concrete
- Gate kit
- Heavy duty hinges
- Latch
- Post caps
- Exterior stain or paint
- Wood sealer

Tools
- Tape measure
- String line
- Stakes
- Marking paint
- Post hole digger
- Power auger
- Shovel
- 24 inch level
- Torpedo level
- Speed square
- Circular saw
- Miter saw
- Drill or impact driver
- Drill bits and driver bits
- Wheelbarrow
- Mixing tub or bucket
- Clamps
- Sawhorses
- Safety glasses
- Work gloves
- Hearing protection
- Dust mask
- Utility knife
- Carpenter’s pencil
Step-by-Step Build Guide
- Confirm property lines and any permit or HOA requirements, then schedule utility locating so you dig safely.
- Sketch the run, plan gate width and swing direction, and pull a taut string line to define straight sections.
- Mark post centers 6 to 8 feet apart along the line and keep spacing symmetrical at corners and gates.
- Dig holes below local frost depth where applicable and add about 4 inches of gravel to each hole for drainage.
- Set the first corner post in concrete, plumb it carefully, brace it solidly, and align the face to the string line.
- Place the next post, match height to your reference line, and repeat until the full run is set and braced.
- On sloped ground, decide whether to step the rails for a crisp terraced look or rack the boards to follow grade.
- After the concrete has set enough to hold, attach 2×4 rails between posts with exterior screws while keeping the top rail level.
- Hold the bottom rail about 6 inches above grade to reduce rot risk and maintain a consistent visual line.
- Install pickets starting from a highly visible corner and use a spacer block to keep even gaps while checking plumb.
- Trim picket tops to a consistent line after a run is installed or use a guide board to set height as you go.
- Build the gate from 2x4s with a diagonal brace running from the lower hinge side to the upper latch side for strength.
- Hang the gate with heavy duty hinges, set a uniform 1/2 inch clearance all around, and install the latch at a comfortable height.
- Sand sharp edges, seal all cut ends, apply exterior stain or paint, and cap posts to protect exposed end grain.
- Walk the fence to tighten fasteners, adjust any out of plumb pickets, and backfill around posts with soil sloped away for drainage.
- Add simple curb appeal with a narrow planting strip, solar path lights, or a trellis panel that invites climbers to soften the new garden fencing.

Understanding HOA Rules
Before you buy materials, review your HOA’s CC&Rs and design guidelines to confirm allowed heights, materials, colors, post caps, and gate placement. Noncompliant garden fencing can lead to fines or forced removal.
- Many HOAs cap fence height by location, often 3 to 4 feet in front yards and up to 6 feet in backyards.
- Setbacks from property lines, sidewalks, and easements are common and often require the fence to sit inside the line.
- Approved materials are usually listed, such as wood, vinyl, or aluminum, and chain link is often restricted.
- Style requirements may specify picket, board-on-board, or horizontal slats to keep a consistent neighborhood look.
- Color rules often allow natural wood tones, white, or colors that match home trim, with bright hues discouraged.
- Finish standards can require a clear sealer or stain and prohibit unfinished or weathered lumber at installation.
- Post and cap designs may be limited to flat, pyramid, or certain decorative options that fit community guidelines.
- A good neighbor rule often requires the finished side to face the street or the adjacent property.
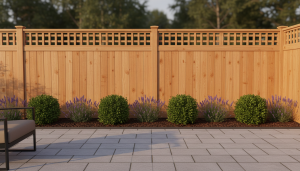
Garden Fencing Styles And Design
Garden fencing shapes privacy, manages views, and frames plantings while complementing your home. Choose styles that fit life, from classic pickets to modern slats, and plan durable details for weather.
Privacy Fences
Solid or board-on-board privacy fences deliver seclusion and a calm backdrop for plantings. Choose six foot height where allowed, with heavier posts and rails to handle wind and weight. Board-on-board overlaps prevent gaps as wood seasons and shrinks, which preserves privacy over time. For a friendlier look, place trim boards and a simple cap rail that finish the edges so the garden fencing reads intentional and polished.
Semi-Privacy With Good Neighbor Appeal
Semi-privacy designs use spaced pickets or shadowbox construction to filter views while sharing light and air. Alternating boards on each side balance the look for both yards and soften hard boundaries. Choose one inch gaps for a pleasant screen that still lets breezes move through beds. Many neighborhoods prefer this neighborly garden fencing because it feels open, avoids a wall effect, and still contains playful pets.
Classic Picket Style
Classic picket garden fencing frames front yards with charm and an inviting view line. Pickets can run straight, scalloped, or pointed to echo your home’s trim details and porch rhythm. Keep heights near three to four feet for conversation-friendly boundaries that still guide toddlers and small dogs. Paint in white or match trim colors, then layer low perennials that soften the base and signal care.
Modern Horizontal Slats
Horizontal slat garden fencing reads contemporary and calm, with strong lines that pair well with mid-century and modern homes. Use rot-resistant species like cedar and keep consistent gaps for rhythm and airflow. Hidden fasteners or neatly aligned screw rows raise the finish level and reduce visual clutter. Rigid posts and tight rail spacing prevent sag, while a rich semi-transparent stain brings the grain forward.
Lattice And Trellis Toppers
Lattice and trellis toppers add height, privacy, and a graceful place for vines without feeling heavy. A twelve to eighteen-inch topper above solid panels softens the edge and frames sky views. Choose square or diagonal lattice depending on your architecture and keep openings small enough for screening. Train clematis or climbing roses thoughtfully so stems do not pry joints, and maintain airflow to prevent mildew.
Metal And Mixed Materials
Combining wood with metal elevates style and durability. Black aluminum posts with cedar infill create crisp lines and make garden fencing feel fresh without heavy maintenance. Steel mesh or welded wire panels inside wood frames keep pets secure while staying visually light. Choose powder-coated hardware and consistent finishes so the mix reads intentional. Touch up exposed cuts and seal wood to manage the weather over time.

Height, Proportion, And Sightlines
Proportion anchors design. Match fence height to window sills, porch rails, or hedges so the garden fencing belongs with the facade. Step down near sidewalks and driveways to protect sightlines and add neighborly openness. In backyards, six feet feels private, while five feet can be enough with planting screens. Keep posts taller for cap detail and use consistent top lines that carry the eye comfortably.
Designing For Slopes And Uneven Grades
Sloped sites need a plan for gaps and clean lines. Stepped runs keep boards level and create tidy terraces, perfect for formal gardens. Racked sections follow grade with angled rails that hug the slope and minimize gaps under the fence. Add a rot resistant kickboard along the bottom to protect pickets from soil contact and to block pets from exploring under new garden fencing.
Color, Finish, And Maintenance Strategy
Finish choices shape mood and upkeep. Warm cedar stains feel natural and hide dust, while soft gray or white reads coastal and brightens shade. Dark brown or black makes plant colors pop and helps garden fencing recede so flowers take the stage. Use UV-blocking semi-transparent stain to preserve grain and plan light washing each spring, plus quick hardware checks after winter storms.
Conclusion
With a clear plan, garden fencing becomes a satisfying weekend project that pays off in privacy and polish. Measure carefully, set solid posts, and finish with details that protect wood and enhance design. Choose materials that match your climate and style so the fence lasts and looks right from the street. Start small with a side run, learn your rhythm, then complete the full perimeter with confidence.
A good example of a garden fence is the classic picket fence. Use our guide on how you can install your own white picket fence!
FAQs
- What Is The Best Way To Set Fence Posts In Problem Soils?
- Clay holds water while sand drains too fast, so tailor your post footing. In clay, use a gravel base and bell the bottom of the hole for anti-heave, then slope the concrete crown above grade for runoff. In sand, add deeper footings and a cardboard form to contain concrete. Always seal end grain.
- How Can Garden Fencing Reduce Street Noise?
- Noise reduction requires mass and airtight construction, which typical wood pickets lack. Upgrade to board-on-board garden fencing, add a continuous cap and sealed trim, then hang mass-loaded vinyl on the rail side before boards. Pair the fence with a dense evergreen hedge or a low berm. Together, they cut midrange traffic noise.
- How Do I Stop Dogs And Rabbits From Digging Under The Fence?
- For pets and rabbits, back your decorative fence with black welded wire that visually disappears. Bury an L-shaped apron of the mesh 8 to 12 inches deep, extending outward to stop digging. Keep the bottom board 2 inches off soil to deter rot while denying gaps.
- How Do I Build For High Wind Or Coastal Conditions?
- High wind or coastal areas demand stronger detailing and corrosion resistance. Use six-foot post spacing, deeper footings below frost or scour depth, and hurricane-rated gate hinges with through bolts. Choose 316 stainless or hot-dipped galvanized hardware, not electroplated. Narrower slats or semi-privacy layouts allow pressure equalization and reduce sail effect.
- Are There Eco-Friendly Options For Garden Fencing?
- Eco-friendly garden fencing starts with FSC-certified wood and low VOC finishes. Waterborne acrylic stains cure fast, resist UV, and clean up easily, which lowers environmental impact. Consider metal post sleeves so future board replacements preserve footings. Reuse offcuts as planter trim, and compost sawdust free of paint or solvent residues.