Last Updated on December 8, 2025 by teamobn
Coats, hats, keys, and bags often end up in a messy pile without a good place to hang them. DIY coat hooks are an easy and creative way to add storage and personality to your entryway, mudroom, or bedroom. Instead of buying generic hooks, you can make unique ones using items you already have around the house.
In this guide, you will discover over 10 imaginative coat hook ideas you can craft yourself. We will show you how to repurpose everyday objects like bicycle chains, tree branches, old lighting fixtures, and even discarded gadgets into functional and stylish hooks.
For each idea, we will cover the materials you need, the tools required, and simple steps to follow, making it easy for anyone to create their own custom storage solutions.
DIY Coat Hook Ideas at a Glance
Here is a quick overview of the creative coat hook ideas you will find in this guide:
- Bicycle Chain Coat Hooks: Perfect for an industrial or modern look.
- Tree Branch Hooks: An eco-friendly and rustic option for any home.
- Mini Figurine Hooks: A fun and playful addition, especially for kids’ rooms.
- Drawer Handle Hooks: A smart way to upcycle old furniture hardware.
- Hanger Hooks: Transform wooden hangers into unique wall hooks.
- Construction Material Hooks: Repurpose tools like wrenches or C-clamps.
- Pipe Valve Hooks: Give plumbing parts a new life as sturdy hooks.
- Spoon and Fork Hooks: A quirky and charming idea for kitchens or dining areas.
- Other Kitchen Item Hooks: Get creative with rolling pins, cups, and more.
- Technology and Gadget Hooks: Modern and unique hooks from old CDs, hard drives, or cell phones.
You can pick one idea and make a single hook, or combine several ideas for a full coat rack.
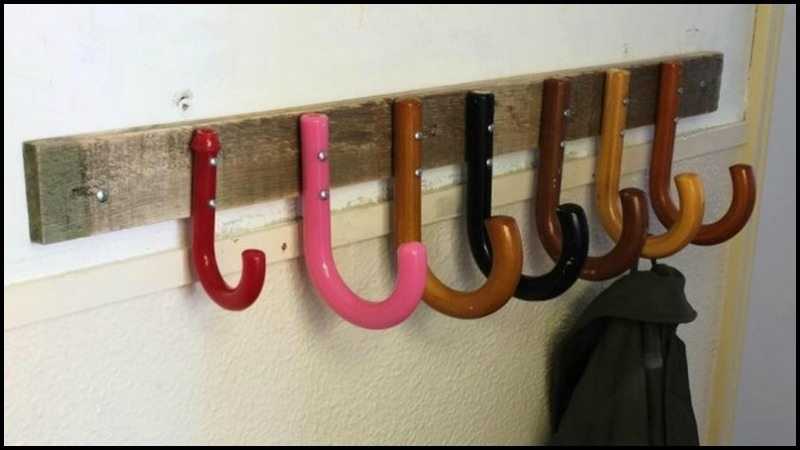
As you can see here, all hooks aren’t the same. Some are spoons or forks. Others are tree branches, old bike chains, tap, and light fittings, and even discarded drawers and doorknobs.
Click on any image to start the lightbox display. Use your Esc key to close the lightbox. You can also view the images as a slideshow if you prefer 😎
Check Out These Creative Coat Hooks
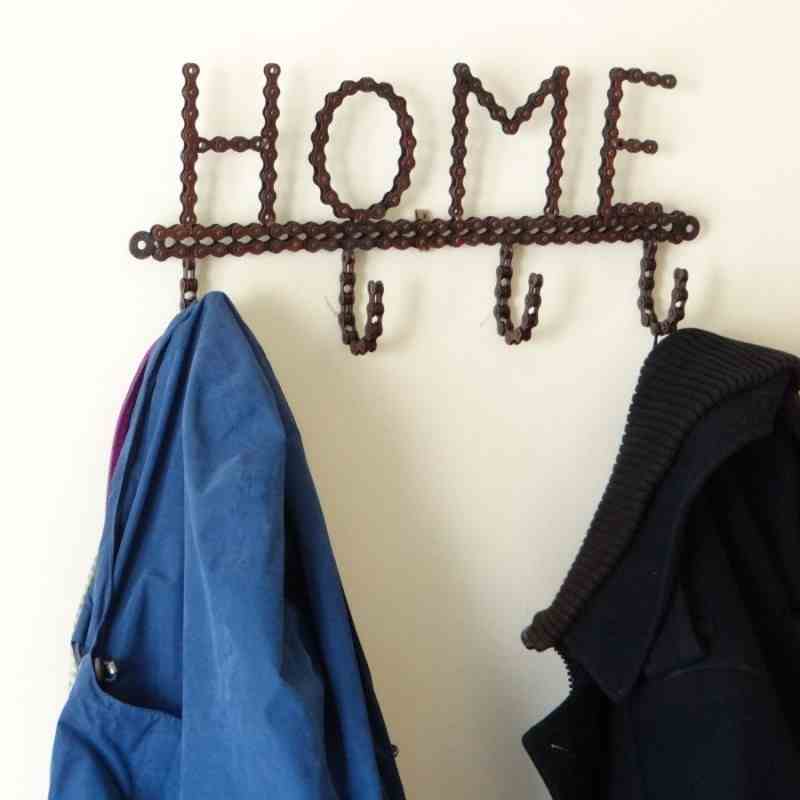
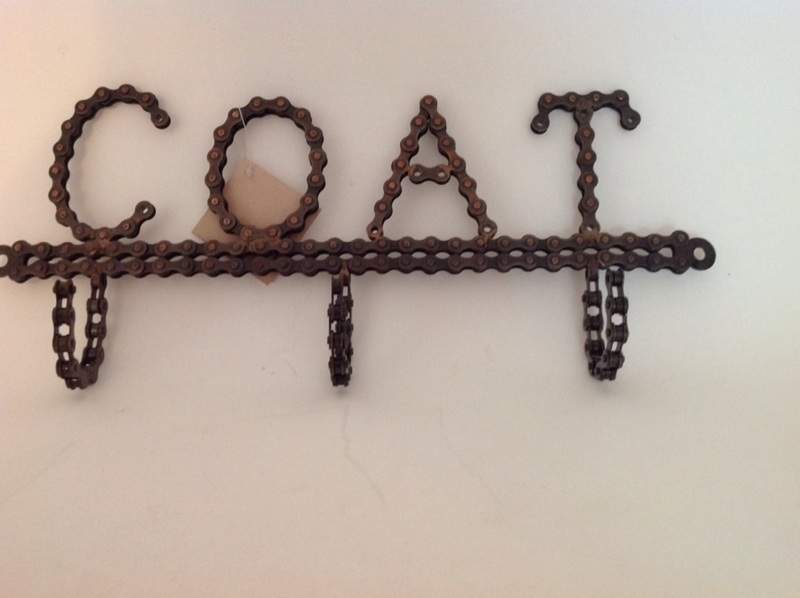
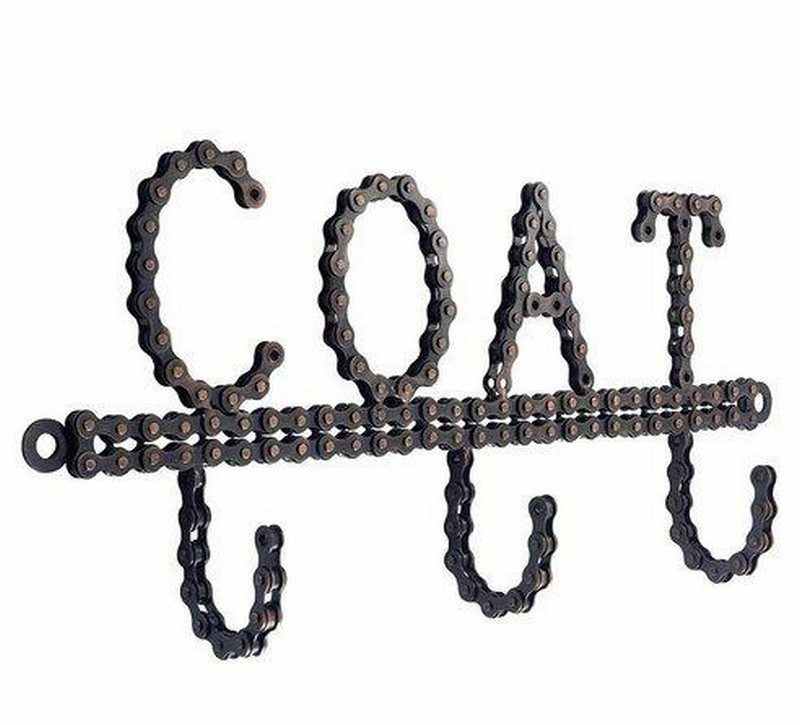
Bicycle Chain Coat Hooks
Perfect for an industrial or modern look. Bicycle chains are flexible, strong, and already shaped to curve. With a bit of cleaning and a strong backing board, they can become eye catching coat hooks.
Best places to use them: Entryway, hallway, garage, office, or a teenager’s room.
What Are the Materials Needed to Build a Bicycle Chain Coat Hooks?
- Old bicycle chains
- Wooden board or solid wall backing
- Screws and wall anchors
- Degreaser or dish soap
- Clear spray sealant or metal polish (optional)
What tools are needed for this build?
- Drill and drill bits
- Screwdriver
- Pliers
- Cleaning brush or old toothbrush
- Cloth or rag
How to build a Bicycle Chain Coat Hook: Step-by-Step Instructions
- Mount the board on the wall. Use a drill and wall anchors if you cannot screw directly into studs. Make sure the board is level and firmly attached so it can hold the weight of coats and bags.
- Clean the chains. Remove any grease or dirt with degreaser or dish soap. Rinse and dry them well. You can polish them or spray a clear sealant if you want a shiny finish.
- Shape the hooks. Use pliers to bend sections of the chain into hook shapes. You can make simple curves or more dramatic loops, as long as they can support a coat or bag.
- Prepare the backing board. Cut and sand a wooden board to the length you want. Mark where each chain hook will go, leaving enough space between them for bulky coats.
- Attach the chains. Secure one end of each chain to the board with screws. Shape the middle of the chain into a hook, then screw down the other end so the chain holds its curved shape.
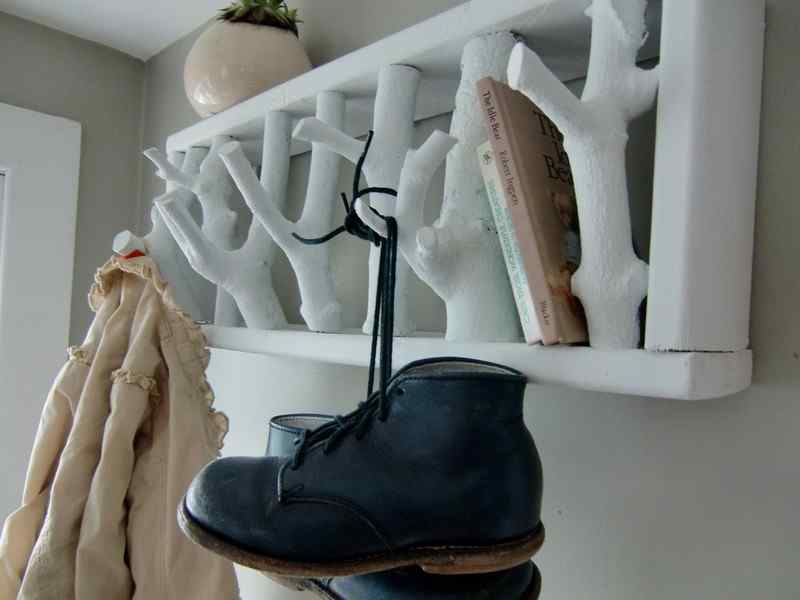
Tree Branch Hooks
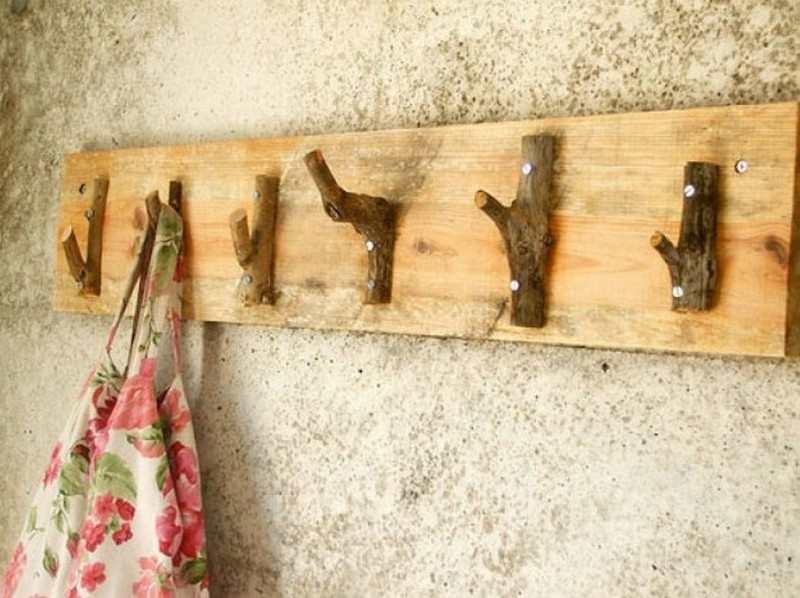
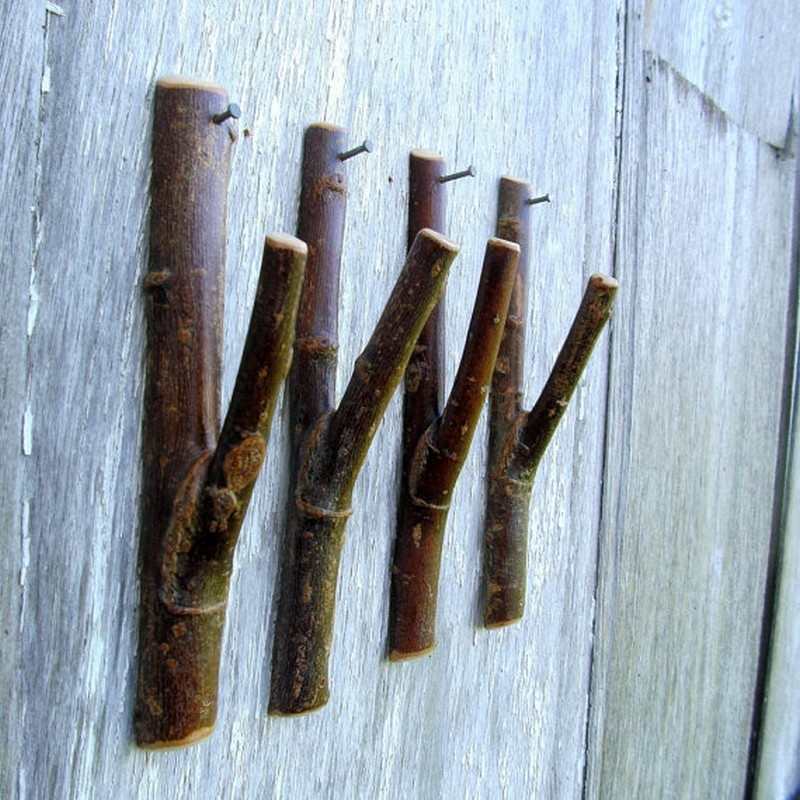
An eco-friendly and rustic option for any home. Tree branches have natural bends and offshoots that can act as ready-made hooks. With a bit of sanding and sealing, they create warm and rustic storage for coats, hats, and bags.
Best places to use them: Entryway, hallway, bedroom, or cabin-style rooms.
What Materials Are Needed to Build Tree Branch Hooks?
- Dry, sturdy branch with several offshoots
- Screws and wall anchors
- Wood finish, oil, or paint
What Tools Are Needed for This Build?
- Hand saw, or pruning saw
- Sandpaper
- Drill and drill bits
- Screwdriver
- Paintbrush
How to Build Tree Branch Hooks: Step-By-Step Instructions
- Choose the branch. Look for a dry, solid branch. Avoid soft, rotten, or cracked wood. Pick a branch with small side branches that angle upward. These will become your hooks.
- Cut to size. Cut the branch to the length you want for your coat rack. You can keep the natural shape or trim off extra side branches if they are in the way.
- Sand the surface. Sand the branch until it feels smooth. Round off any sharp points on the hook ends to prevent them from catching or tearing clothing.
- Seal or paint the branch. Apply clear wood finish, oil, or paint to protect the wood. Allow it to dry completely according to the product instructions.
- Mount the branch. Drill pilot holes through the thickest part of the branch. Hold the branch against the wall and mark the matching spots. Drill into the wall and use studs or wall anchors. Screw the branch into place with the hooks pointing upward.
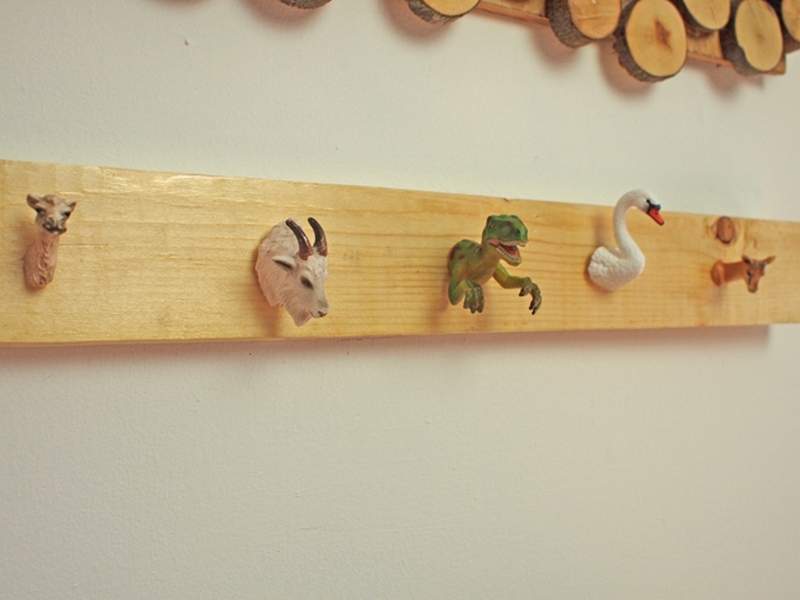
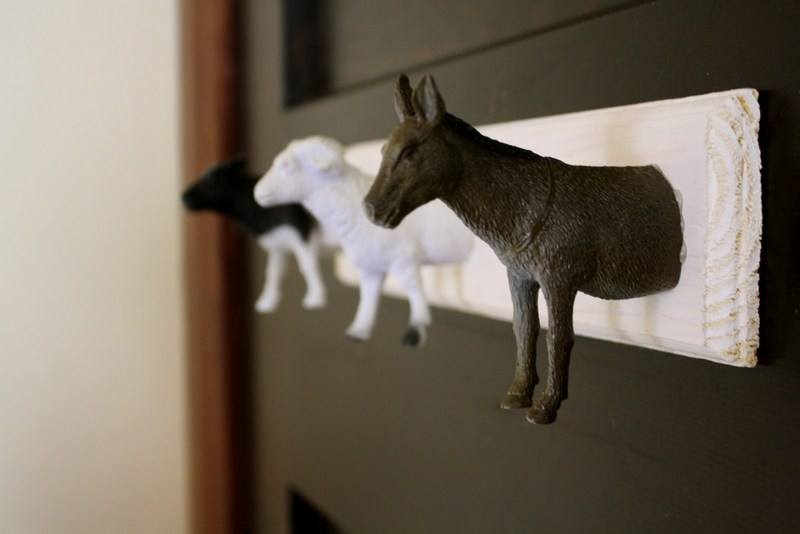
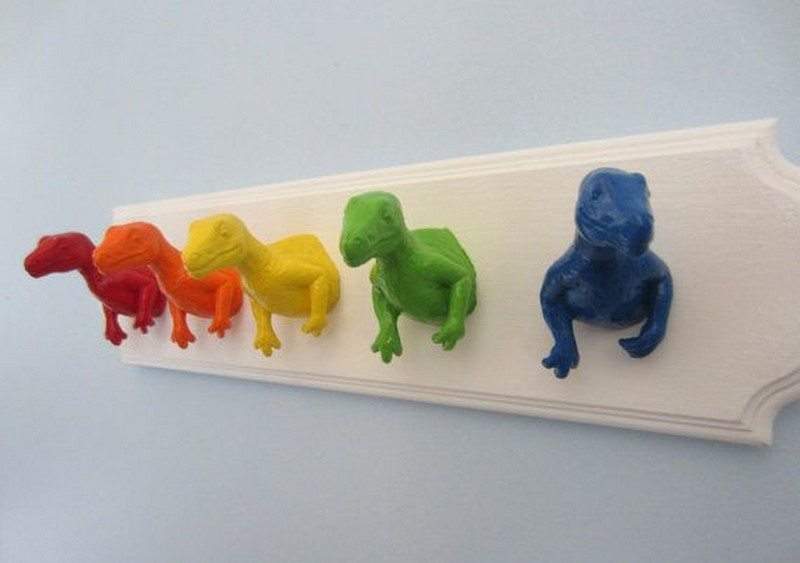
Mini Figurine Hooks
A fun and playful addition, especially for kids rooms
Mini figurines can turn a simple hook board into something children are excited to use. Characters, animals, or toy soldiers make hanging up coats and backpacks feel like play instead of a chore.
Best places to use them: Kids bedrooms, playrooms, or homework areas.
What Are the Materials Needed to Build Mini Figurine Hooks?
- Mini figurines that are sturdy and flat enough to attach
- Small metal hooks or knobs
- Wooden board or ready made coat rack base
- Strong glue suitable for plastic and wood, or small screws
What Tools Are Needed for This Build?
- Drill and drill bits
- Screwdriver
- Sandpaper (optional)
- Clamp or heavy books to hold items in place while glue dries
How to Build a Mini Figurine Hooks: Step-By-Step Instruction
- Mount the board. Attach the board to the wall, making sure it sits at a height where your child can easily reach it. Use wall anchors for safety.
- Plan your design. Decide how many hooks you want and how you will arrange the figurines. You can line them up in a row or group them in themed sections.
- Prepare the board. Sand the board if needed, then paint or stain it. Let it dry fully.
- Install the hooks. Mark equal spacing along the board and drill small pilot holes. Screw in your hooks or knobs securely.
- Attach the figurines. Place each figurine in front of or above a hook. Use strong glue or small screws to secure them. Hold them in place with a clamp or heavy books while the glue dries.

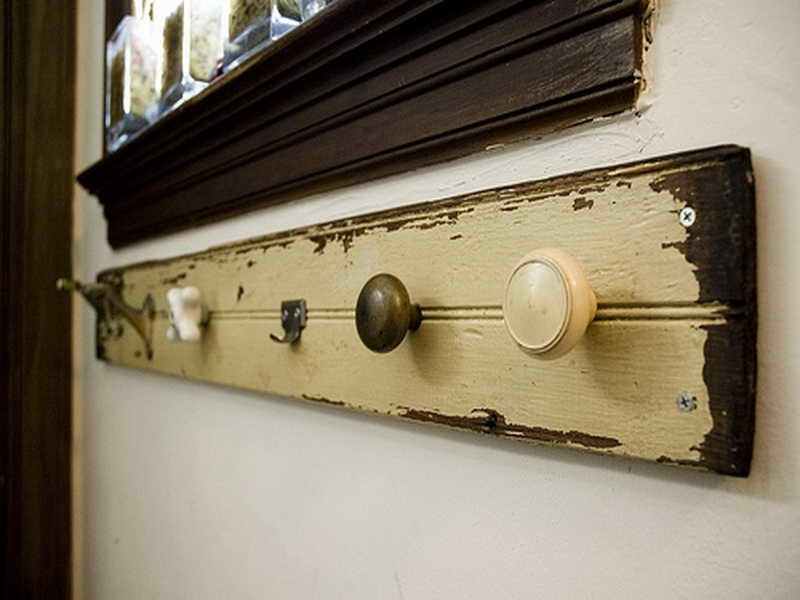
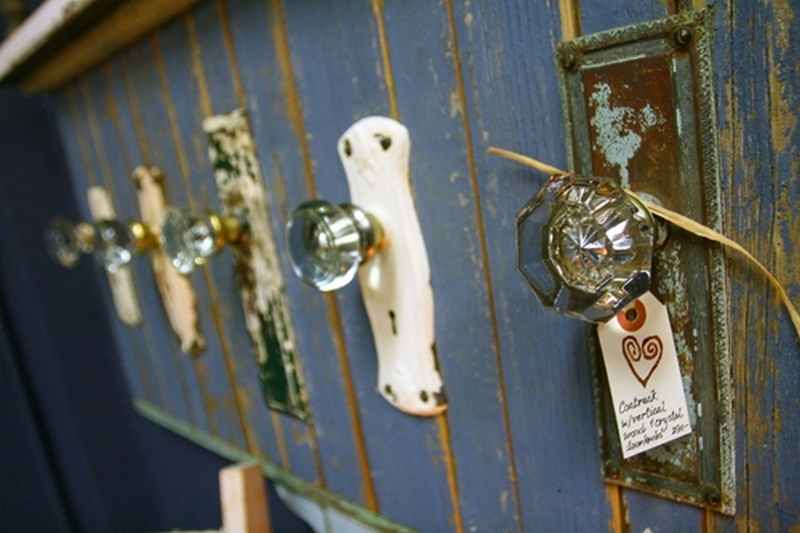
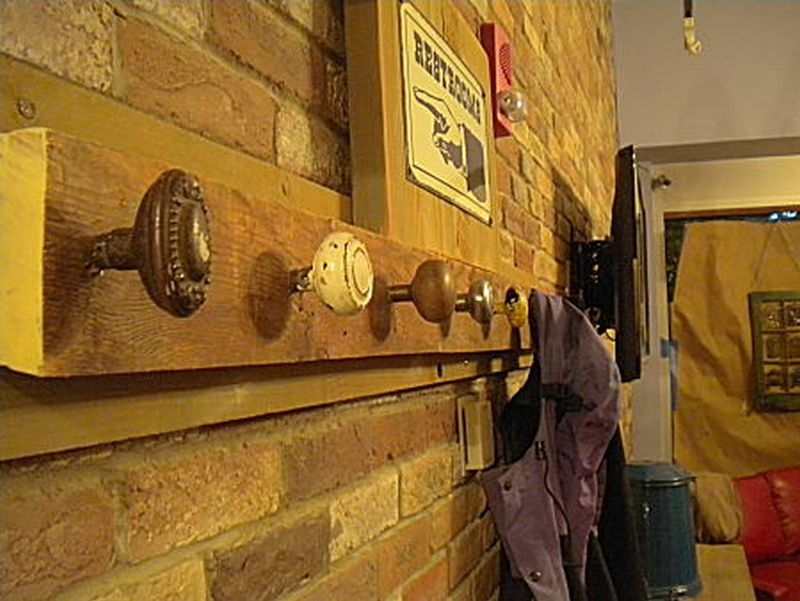
Drawer Handle Hooks
A smart way to upcycle old furniture hardware. Old drawer handles and knobs often have beautiful designs. Instead of throwing them away, you can mount them on a board or straight onto the wall and use them as hooks.
Best places to use them: Entryways, closets, bedrooms, bathrooms.
What Materials Are Needed to Build Darwer Handle Hooks
- Old or new drawer handles and knobs
- Wooden board (optional if you prefer a rail)
- Screws and wall anchors
What Tools You’ll Need?
- Drill and drill bits
- Screwdriver
- Level
- Sandpaper and paint or stain for the board (optional)
How to Make Drawe Handle Hooks: Step-By-Step Instructions
- Choose your handles. Mix and match different styles for a playful look, or choose matching handles for a clean, modern style.
- Prepare the board. If you are using a backing board, cut it to size and sand it. Paint or stain it if you like and let it dry.
- Mark the layout. Decide where each handle will go and mark the spots. Keep enough space between handles so coats do not overlap too much.
- Attach the handles. Drill pilot holes, then screw the handles or knobs into the board. Make sure each one is tight and does not wobble.
- Mount on the wall. Use a level to keep the board straight. Drill into studs or use wall anchors, then screw the board into place.
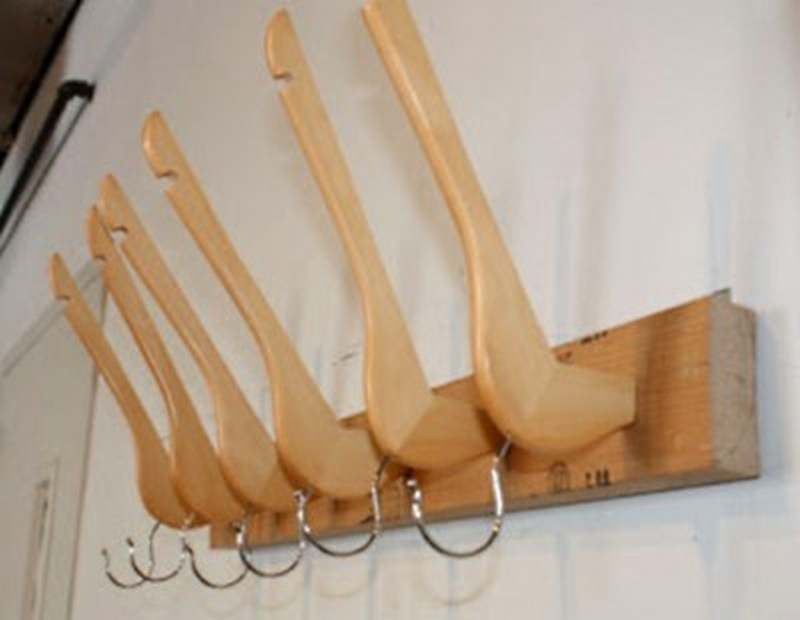
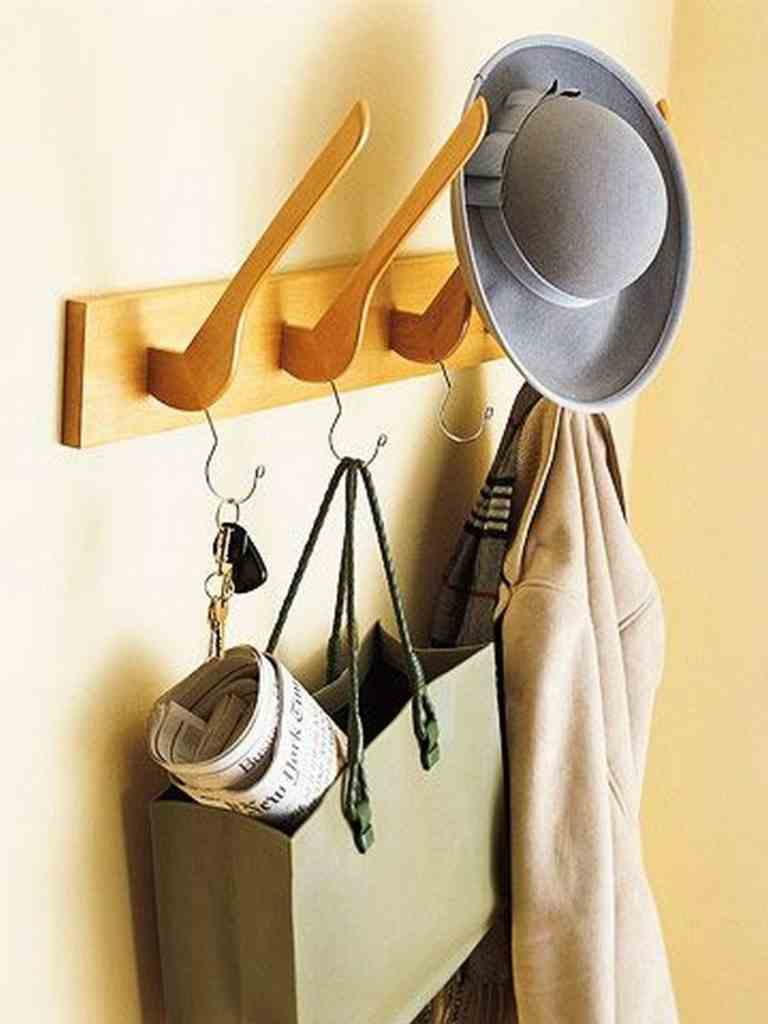
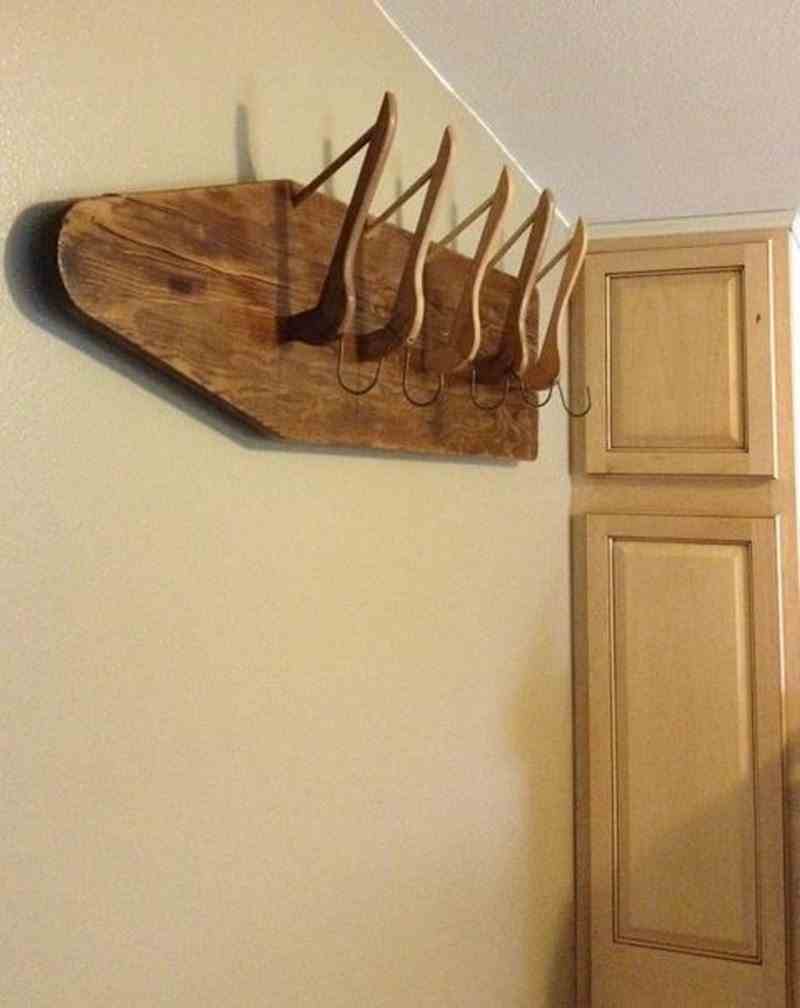
Hanger Hooks
Transform wooden hangers into unique wall hooks. Wooden clothes hangers can be cut and reshaped into clever wall hooks. They keep the curved form of a hanger, which is gentle on coat shoulders.
Best places to use them: Bedrooms, closets, laundry rooms, guest rooms.
What Materials Are Needed to Create Hanger Hooks?
- Wooden hangers
- Screws and wall anchors
- Wood glue (optional, for extra support)
What Tools Are Needed for This Build?
- Saw (hand saw or jigsaw)
- Drill and drill bits
- Screwdriver
- Sandpaper
How to Create Hanger Hooks: Step-by-Step Instructions
- Sand the edges. Smooth the cut surfaces and any sharp corners with sandpaper.
- Mount the rack. If you used a board, attach it to the wall at a comfortable height. Make sure it is level and well supported.
- Attach to a backing board or wall. You can mount the hanger pieces directly to the wall or onto a board.
- Cut the hangers. Cut each hanger so you keep the curved shoulder part and some of the straight middle. This curved piece will be your hook.
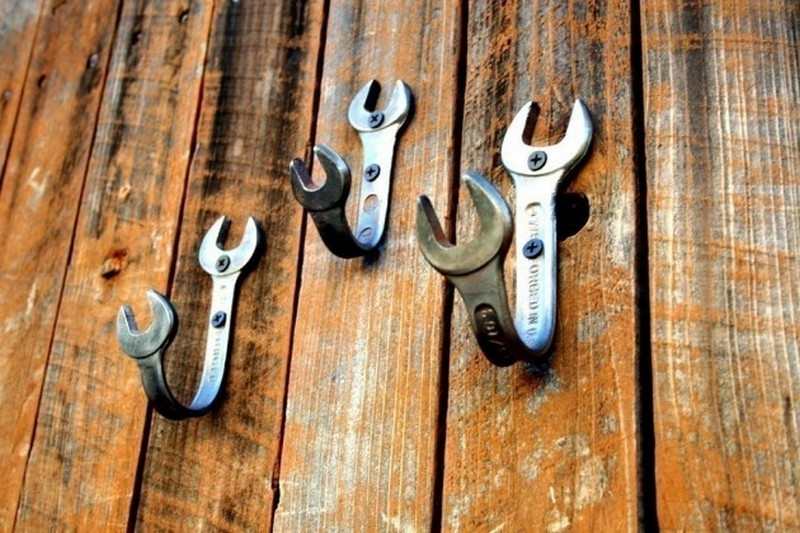
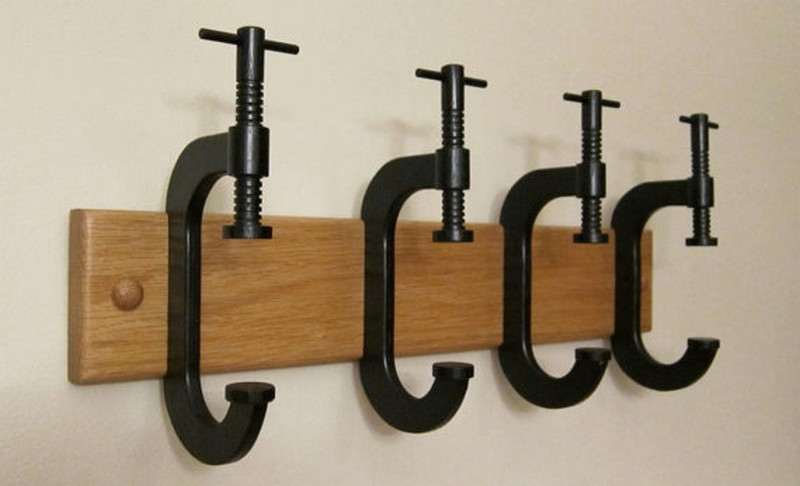
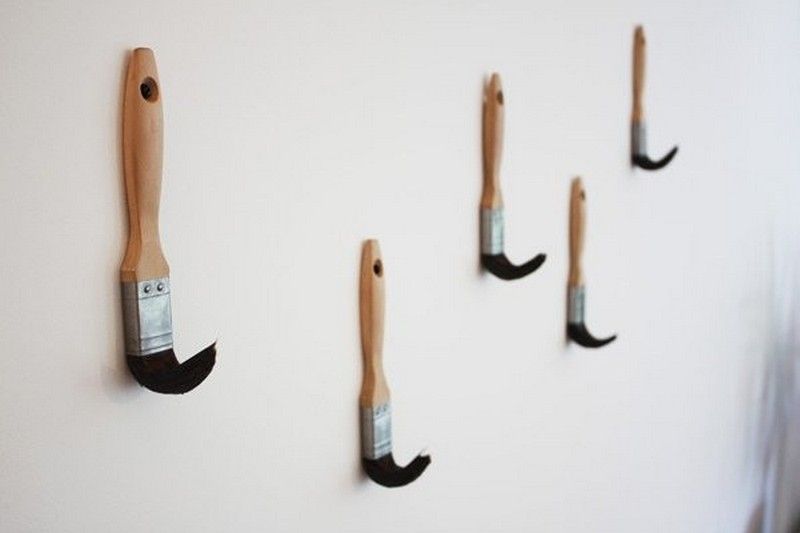
Construction Material Hooks
Repurpose tools like wrenches or C clamps
Old tools and construction materials often have strong shapes that make great hooks. Wrenches, C clamps, and even paint brushes can be mounted as hooks or holders.
What Materials Are Needed for This Construction Material Hooks
- Old wrenches, C clamps, or other strong metal tools
- Wooden board or directly on a wall
- Screws and wall anchors
What Tools Are Needed for This Build?
- Drill and drill bits
- Screwdriver
- Metal file or sandpaper to smooth rough edges
How to Create Hooks Using Construction Materials: Step-by-Step Instruction
- Pick your tools. Choose tools that are strong and not too heavy. Check for sharp edges and smooth them with a file if needed.
- Plan the layout. Arrange the tools on a board or against the wall to see how they will look and how much space they need.
- Drill and mount. Drill pilot holes in the tools where solid metal allows, then screw them onto the board or wall. Position them so they stick out enough to hang coats and bags securely.
- Mount the board. Attach the board to studs or use strong wall anchors. These hooks are great for heavy items like backpacks or work coats.
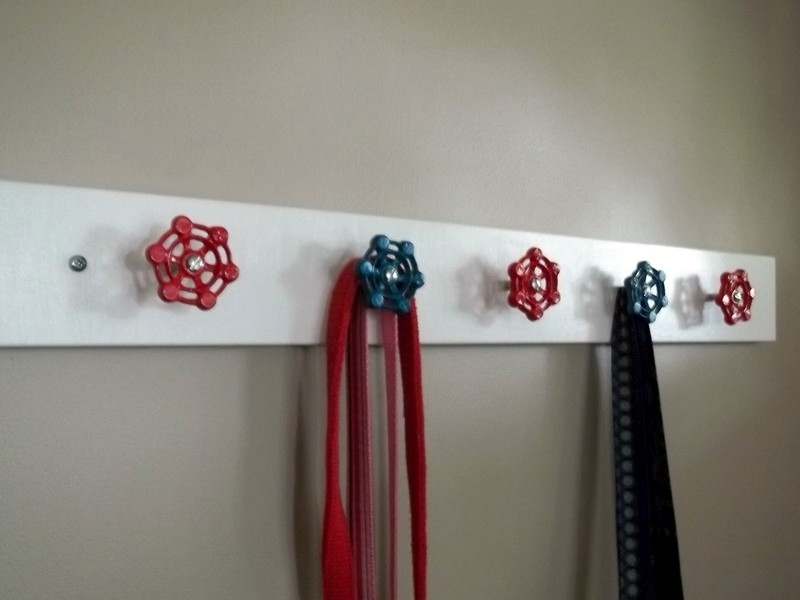
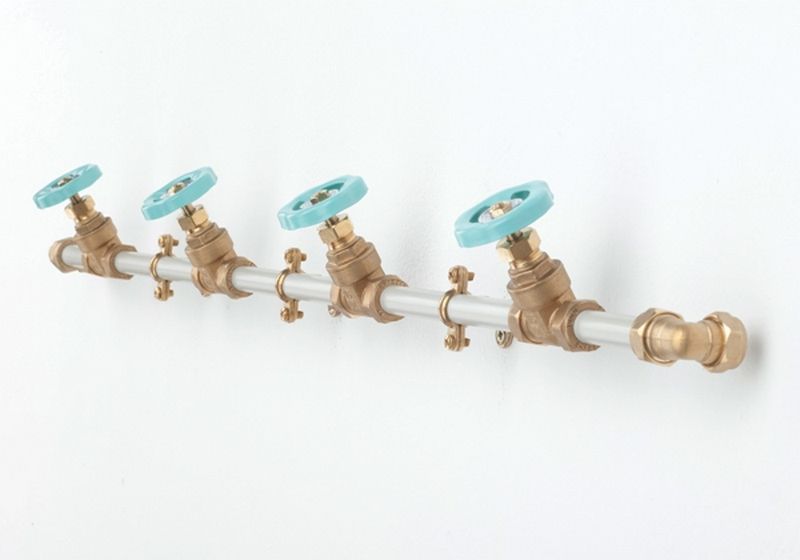
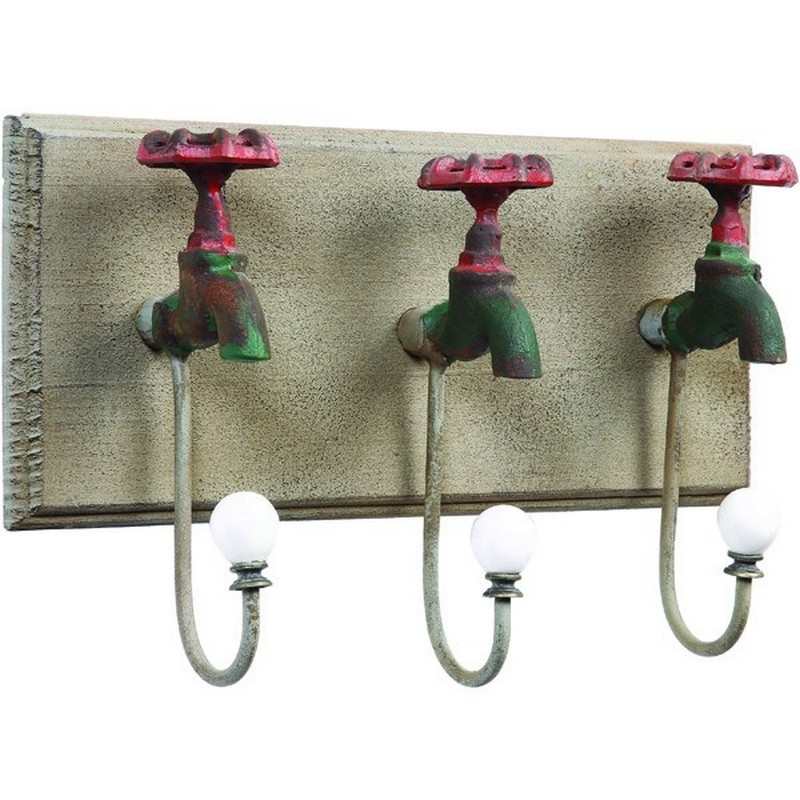
Pipe Valve Hooks
Give plumbing parts a new life as sturdy hooks
Pipe fittings and valves have bold shapes and are made to handle pressure. This makes them perfect for coat hooks that can hold heavy items.
Best places to use them: Entryways, industrial style bathrooms, laundry rooms, or loft spaces.
What Materials Are Needed to Build Pipe Valve Hooks
- Pipe valves, elbows, flanges, and caps
- Screws and wall anchors
- Optional short pieces of metal or plastic pipe
What Tools Are Needed for This Build
- Drill and drill bits
- Screwdriver
- Wrench (if tightening pipe pieces together)
How to Create Hooks Using Construction Materials: Step-by-Step Instruction
- Build your hook. Screw a valve or cap onto a short piece of pipe. Attach that pipe to a flange that will mount to the wall. Adjust until the hook points slightly upward.
- Test the strength. Tighten all parts with a wrench. The hook should not move or wobble.
- Mount on the wall. Hold the flange against the wall and mark the screw holes. Drill into studs or use strong wall anchors, then screw the flange into place.
- Repeat for more hooks. You can install several hooks in a row or create a pattern.
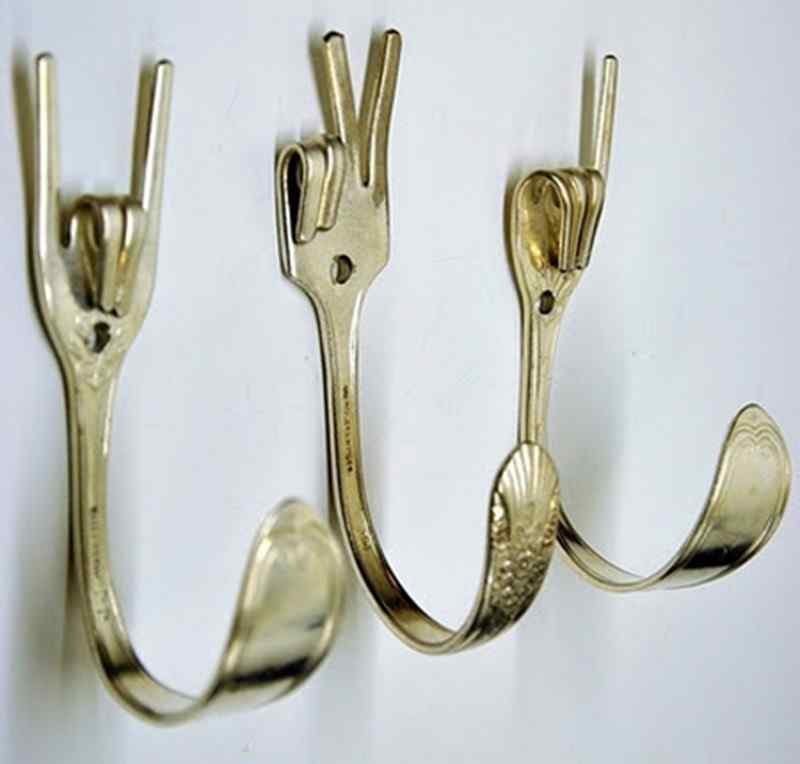
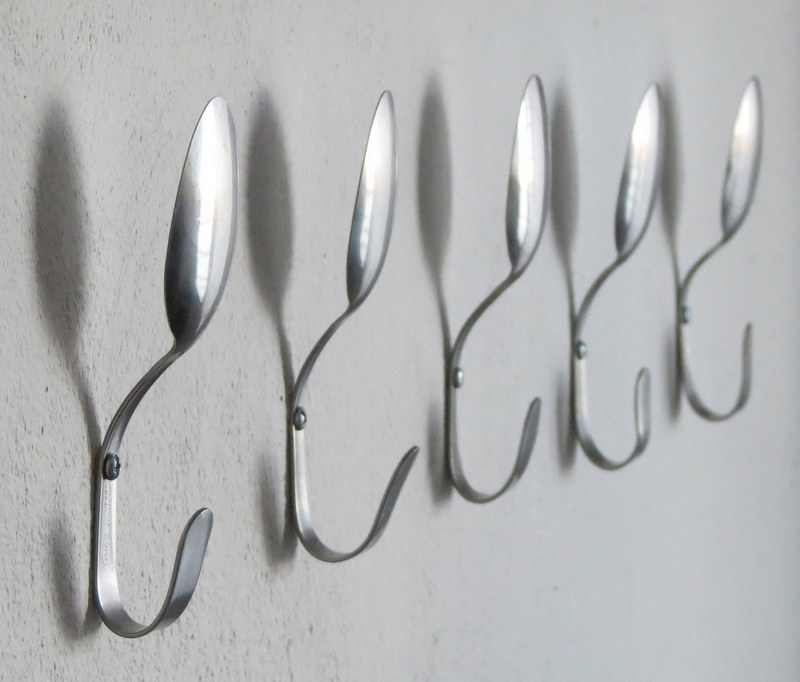
Spoon and Fork Hooks
A quirky and charming idea for kitchens or dining areas
Old spoons and forks can be bent into charming hooks. They are perfect for hanging aprons, dish towels, light jackets, or keys.
Best places to use them: Kitchens, pantries, dining rooms, or breakfast nooks.
What Materials Are Needed for These Spoon and Fork Hooks
- Metal spoons and forks
- Wooden board or directly on a wall
- Screws and wall anchors
What Tools Are Needed for This Build?
- Pliers
- Bench vise (helpful but optional)
- Drill and drill bits
- Screwdriver
- Hammer and cloth (optional, to help with bending)
How to Create Spoon And Fork Hooks: Step-by-Step Instructions
- Bend the cutlery
Clamp the spoon or fork handle in a vise or hold it firmly with pliers. Carefully bend the handle to form a hook shape. You can bend the bowl of the spoon slightly if needed. - Drill mounting holes
Drill a small hole near the top of the handle so you can screw it to the board or wall. - Prepare the backing board
Sand and paint or stain a board if you are using one. Let it dry. - Attach the spoons and forks
Screw each piece of cutlery to the board or directly onto the wall. Aim the hooks upward so items do not slip off. - Mount the rack
Secure the board with screws and anchors. These hooks look especially nice when arranged in a row.

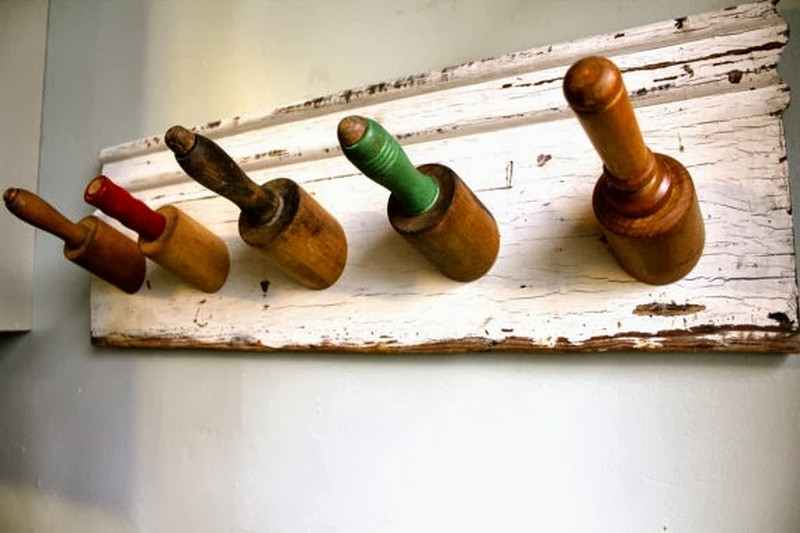
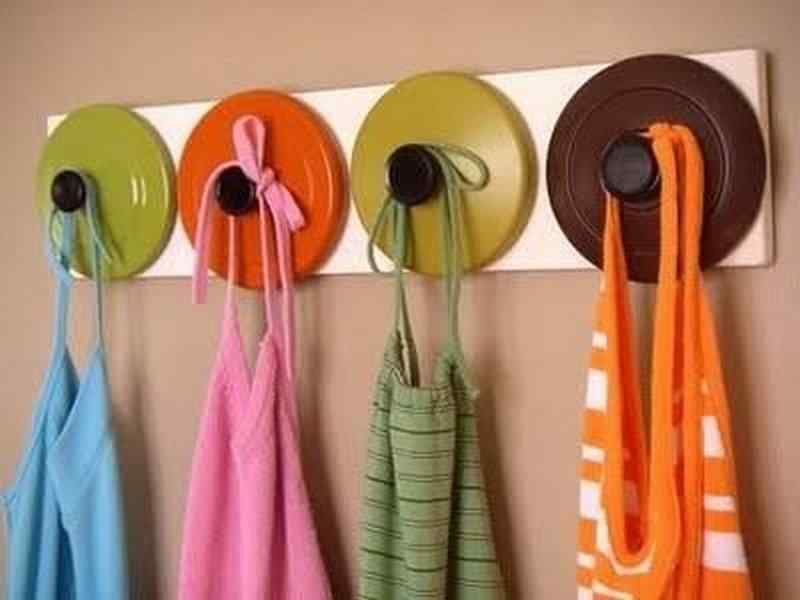
Other Kitchen Item Hooks
Get creative with rolling pins, cups, and more
Many kitchen items can become hooks or holders. For example, a rolling pin can hold tea towels. Small cups can hold keys, and sturdy handles from pots can act as hooks.
Best places to use them: Kitchens, pantries, breakfast bars.
Ideas
- Mount a wooden rolling pin horizontally to hold towels or scarves.
- Hang small enamel cups on screws to hold keys or small items.
- Use sturdy pot lids or their handles as decorative hooks.
Always check that the items are strong enough and that they are firmly attached before hanging anything heavy on them.

Safety Tips for DIY Coat Hooks
Before you start, keep these safety points in mind:
- Wear safety glasses when cutting, drilling, or sanding.
- Use proper wall anchors if you cannot screw into studs.
- Check weight limits for anchors and screws.
- Avoid using sharp or fragile materials in places where children play.
- Test each hook gently before trusting it with heavy items.
FAQ: DIY Coat Hooks
- What is the easiest DIY coat hook to make?
- The easiest options are drawer handle hooks and hanger hooks. Both use simple hardware and basic tools such as a drill and screwdriver.
- How much weight can DIY coat hooks hold?
- If you screw hooks into wall studs and use strong materials, they can hold a heavy coat or full backpack. Hooks in drywall with basic anchors usually hold less. Always check the rating on your anchors.
- Do I need special tools to make DIY coat hooks?
- Most projects only require basic tools. A drill, screwdriver, saw, sandpaper, and pliers are enough for many of the ideas in this guide.
- What materials are best for DIY coat hooks?
- Strong wood, solid metal, and thick plastic are ideal. Avoid thin glass or very brittle plastic for any hooks that need to hold real weight.
- Can I make DIY coat hooks if I live in a rental home?
- Yes. You can mount hooks on a board and attach the board with as few screws as possible, or use strong adhesive strips for very light items. Always follow your rental agreement and patch holes when you move out.
Final Thoughts
Creating your own DIY coat hooks is a rewarding project that combines practicality with personal style. It is a chance to express your creativity, repurpose old items, and add functional storage to your home without spending a lot of money. From the rustic charm of tree branches to the modern edge of recycled gadgets, each hook tells a story and helps keep your space tidy.
We hope this guide has inspired you to look at everyday objects in a new way and to tackle your next DIY project with confidence. Remember, the best coat hook is one that fits your needs, matches your home, and brings a smile to your face every time you use it.
Ready to get started? Pick your favorite idea from this guide, gather your materials, and transform your space with unique, handmade coat hooks. Share your creations with us and inspire others to start their own DIY journey!
If you liked these, you will also like viewing these storage ideas…