Last Updated on November 25, 2025 by teamobn
Organizing muddy wellies and heavy leather boots can be a challenge, especially in small mudrooms and busy entryways. A simple DIY boot rack keeps boots off the floor, helps them dry faster, and protects your floors from dirt, mud, and water.
This guide shows you exactly how to build a DIY boot rack using 2×4 and 1×4 lumber plus PVC or wooden dowels. The project is beginner‑friendly and can be completed in a weekend.
Contents
- 1 Quick Overview: DIY Boot Rack
- 2 Building a DIY Boot Rack Organizer
- 3 Benefits of a Homemade Boot Rack
- 4 Maintenance and Care Tips
- 5 Space-saving Boot Rack Solutions
- 6 FAQ on DIY Boot Rack DIY project
- 7 Conclusion
Quick Overview: DIY Boot Rack
- Skill level: Beginner–intermediate DIY
- Build time: 3–4 hours (plus 24–48 hours paint curing)
- Estimated cost: Low (basic lumber, screws, and spray paint)
- Capacity: About 8 pairs of boots, including tall welly boots and winter boots
- Best for: Mudrooms, entryways, garages, and porches
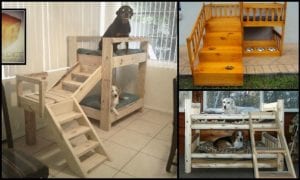
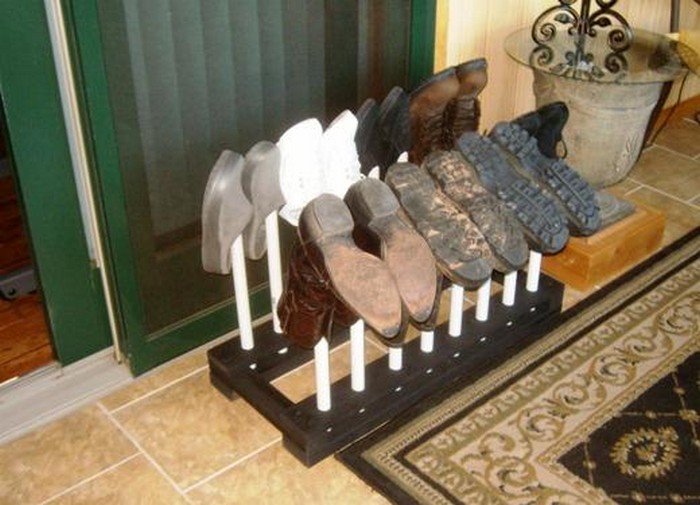
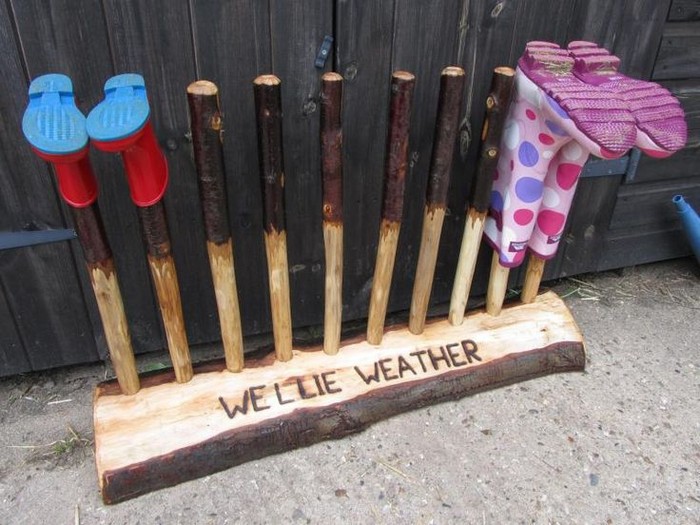
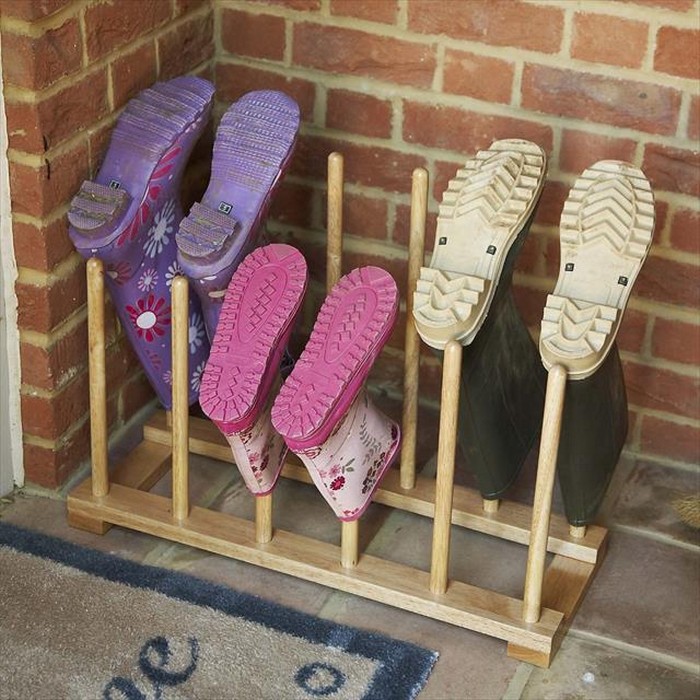
This boot rack stores boots upside down on sturdy dowels. That keeps critters out, lets boots dry with better airflow, and helps them keep their shape.
Looking for more boot storage ideas? Check out our guide to 5 smart boot rack ideas for small spaces.
Is this boot rack the kind of shoe storage you need at home?

Building a DIY Boot Rack Organizer
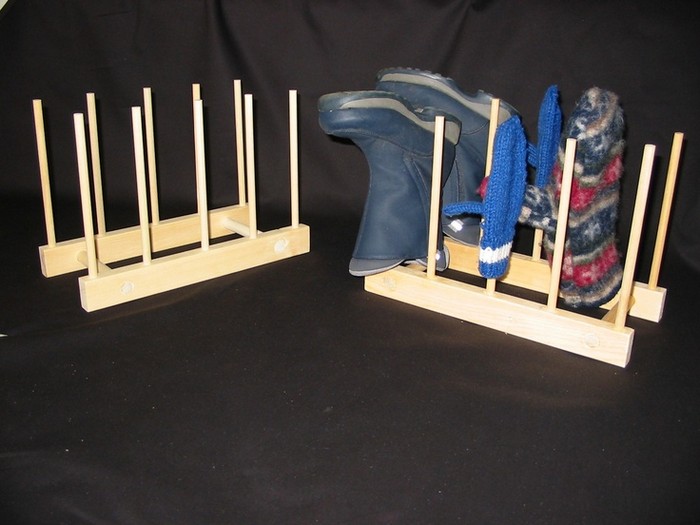
This DIY boot rack is built from two main frames joined by shelves and dowels. Follow the steps below for a sturdy and practical organizer.
Here are the tools and materials needed for you to complete this project.
What materials are needed to build this DIY Boot Rack Organizer?
- 2 pieces of 2×4×96″ lumber
- 2 pieces of 1×4×64″ lumber
- 8 pieces of 1.5″ wood screws
- 16 pieces of 3 1/8″ wood screws
- 1 can of exterior spray paint (your choice of color)
- 16 PVC or wooden dowels, 1 foot long each
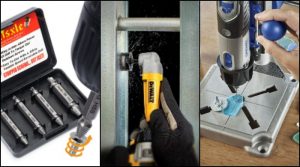
Tools you’ll need:
- Table Saw
- Tape Measure
- Pencil
- Miter Saw
- Drill Press or Power Drill
- 1 1/8″ Paddle Bit
- a 1/8″ Drill Bit
- 1 1/8″ Paddle Bit
- Screw Gun
- Two Gripping Clamps
- Hammer
- Sandpaper or sanding block
How to Build a DIY Boot Rack (Step‑by‑Step)
Step 1 – Measure and Cut the Lumber
- Use your tape measure and pencil to mark four 32″ lengths on the 2×4s. These will form the outer frame of the boot rack.
- Cut along the marks with the miter saw to create four 32″ 2×4 pieces.
- Mark four 32″ lengths on the 1×4s. These will become the shelves and base plates.
- Cut the 1×4s into four 32″ pieces.
- If your PVC or wooden dowels are longer than 1 foot, measure and cut them into 16 equal 12″ sections.
This gives you all the lumber and dowels sized for the rack.
Step 2 – Drill the Frame Holes
- Take one of the 32″ 2×4 pieces. Along the long face, measure and mark hole positions 8″ apart, starting 2″ from one end.
- Repeat the same spacing marks on all four 2×4 frame pieces so the dowels will line up.
- Using the 1 1/8″ paddle bit, drill holes about 1/2″ deep at each mark. These shallow holes will seat the tops or bottoms of the dowels.
- After drilling, lightly sand the holes and edges to remove splinters and rough spots.
Even, aligned holes make the rack look clean and keep the dowels standing straight.
Step 3 – Drill the Rack Rod Slots in the 1×4s
- Lay out your 1×4 pieces. These will serve as base plates to support the dowels.
- With the 1/8″ drill bit, drill two small pilot holes near each end of a 1×4:
- About 3/4″ in from each long edge
- About 2″ from each end
- Add more holes along the board, spaced to match the positions of the larger paddle‑bit holes you drilled in the 2×4s.
- Repeat this hole pattern for all four 1×4 pieces.
- These pilot holes guide the screws that will hold the frame together around the dowels.
Step 4 – Assemble the Frame
- Create a pair of frame assemblies by matching one 32″ 2×4 with one 32″ 1×4.
- Use your gripping clamps to hold the 2×4 on top of the 1×4 so their ends are flush and edges aligned.
- From the 2×4 side, drill through the pilot holes you marked earlier using the 1/8″ bit if you haven’t already.
- Drive the 3 1/8″ screws through the 2×4 and into the 1×4. Tighten the screws enough to snug the boards together without splitting the wood or punching through the bottom.
- Repeat until you have two sturdy frame assemblies, each made from a 2×4 and a 1×4.
These will form the two long sides of your boot rack.
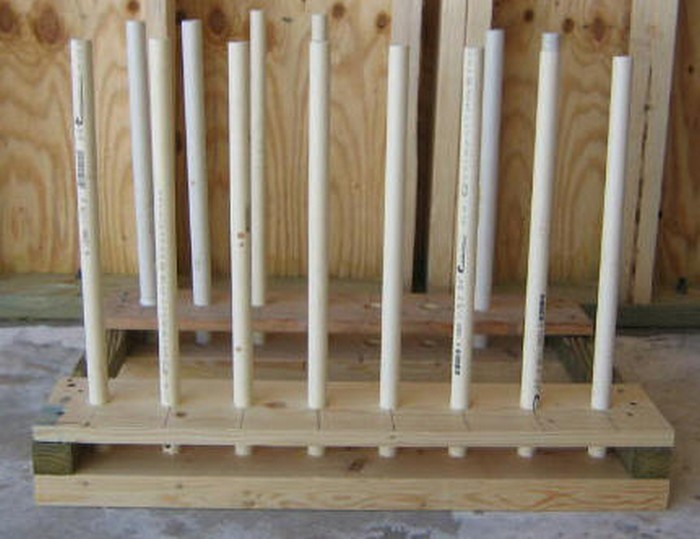
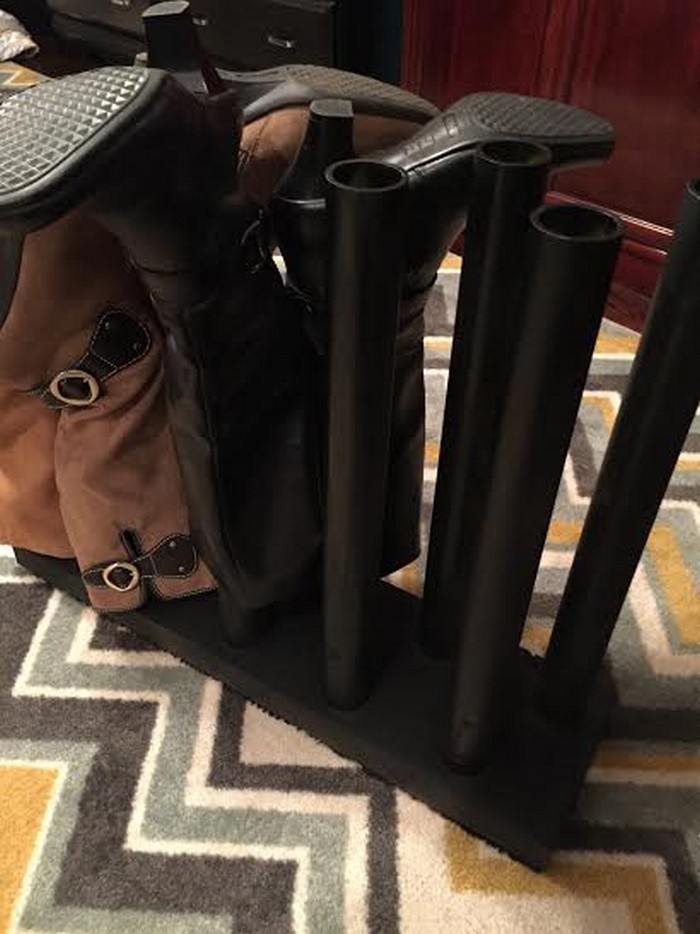
Step 5 – Insert the Dowels or PVC Rods
- Stand your frame assemblies upright, with the drilled paddle‑bit holes facing inward and aligned with the pilot holes in the 1×4s.
- Start placing your 1‑foot dowels or PVC rods into the drilled positions, feeding them through the 2×4 holes and into line with the 1×4 base plates.
- Use the 1.5″ wood screws through the 1×4 pilot holes to capture the ends of the dowels, securing them in place.
- If needed, gently tap dowels in with a hammer so they seat firmly in the 2×4 holes.
- As you work, use a bubble level to keep the frame square and the dowels upright.
Once all 16 dowels are installed, you’ll have a rigid structure ready for finishing.
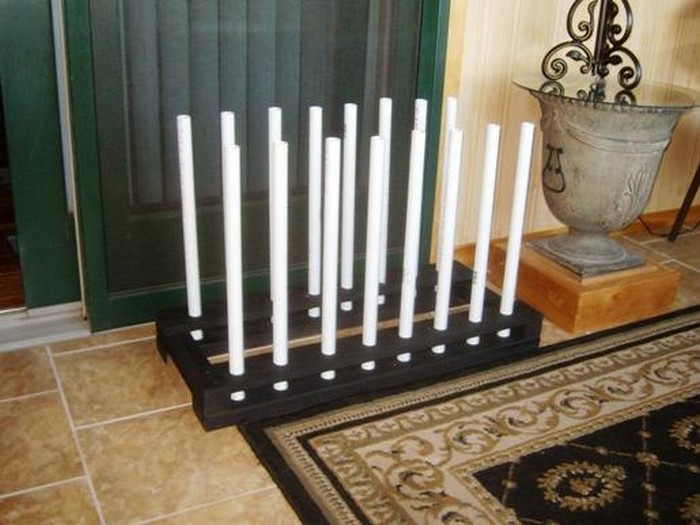
Step 6 – Paint and Cure the Boot Rack
- Move the assembled rack outdoors or to a well‑ventilated area. Lay down a tarp or newspaper to protect your floor.
- Wipe away any dust. If the surface feels rough, quickly sand and wipe again.
- Evenly spray the entire rack with exterior spray paint, including dowels and all exposed surfaces. Exterior paint or sealer helps protect against moisture, mud, and scuffs.
- Let the first coat dry as directed on the can, then apply a second coat if needed for full coverage.
- Allow the rack to cure for 24–48 hours so the finish hardens completely before loading it with boots.
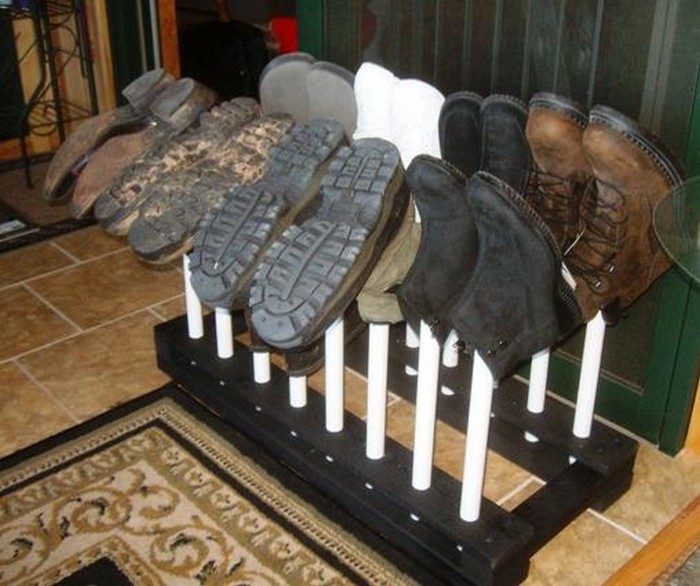
Once cured, your DIY boot rack is ready to use. Place it in your mudroom, entryway, garage, or porch and store boots upside down on the dowels for better drying, airflow, and organization.
Benefits of a Homemade Boot Rack
Building your own boot rack offers several advantages over buying a pre‑made unit.
Custom Design
A DIY boot rack lets you match the design to your home:
- Choose between PVC or wooden dowels
- Adjust the length of the rack to fit your wall
- Set dowel spacing for kids’ boots, tall wellies, or heavy work boots
- Pick a paint color or wood finish that suits your decor
You can build a compact rack for a small entryway or a long rack for a busy family mudroom.
Cost Savings
Ready‑made boot racks, especially heavy‑duty ones, can be expensive. Building your own lets you:
- Use basic framing lumber from any home center
- Repurpose leftover wood or dowels from other projects
- Save money on markup and shipping
With careful planning, a homemade boot rack can cost significantly less than a similar store‑bought version, while being just as strong, or stronger.
Fun and Fulfilling Project
This boot rack is an excellent weekend DIY project:
- You’ll get hands‑on practice with measuring, cutting, and drilling
- It’s beginner‑friendly but still satisfying for more experienced builders
- It’s a great project to tackle with older kids or a handy friend
Seeing a useful piece of storage you built yourself in daily use is always rewarding.
Eco‑Friendly Option
DIY projects offer a chance to make sustainable choices:
- Use reclaimed or scrap wood where possible
- Choose low‑VOC paints and finishes
- Extend the life of old boots by storing them properly
Repurposed and recycled materials give your boot rack character while reducing waste.
Click on any image to start the lightbox display. Use your Esc key to close the lightbox.![]()


For more detailed instructions, you can check out the step-by-step instructions from Rods’ Woodworking Shop.
Maintenance and Care Tips
A little maintenance helps your boot rack last longer and look better.
Wipe It Down Regularly
- Dust or wipe the rack with a clean, dry cloth to remove dirt and grit.
- For stuck‑on mud or grime, use a slightly damp cloth, then dry the wood immediately.
- Avoid soaking the wood, as excess moisture can cause warping or damage over time.
Spot Clean Spills and Stains
- Wipe up muddy splashes or spills as soon as you notice them.
- Quick spot cleaning keeps stains from setting and prevents dirt buildup in corners and around dowels.
Avoid Overloading
- Don’t load more boots than the rack is designed to hold.
- Give each pair its own dowels so weight is distributed evenly.
- Overloading can strain screws and joints or cause the rack to lean.
Safety Checks
- Every few months, check screws, joints, and dowels for looseness.
- Tighten any screws that have worked loose.
- Look for cracks, splinters, or wobbling dowels and repair or replace as needed.
Refresh the Finish
- If your rack lives in a damp entryway, garage, or on a covered porch, the finish may fade over time.
- When paint starts to dull or wear thin, lightly sand any rough spots and apply a fresh coat of exterior spray paint or clear sealer.
- Keeping the finish in good shape protects the wood from moisture and daily wear.
Simple steps like these can keep your DIY boot rack sturdy, safe, and attractive for years.
Space-saving Boot Rack Solutions
When looking to organize your living spaces, finding efficient ways to store boots and shoes is a common challenge. Boots, with their bulkier size compared to other footwear, demand more thoughtful storage solutions. Space-saving boot racks offer a practical and stylish answer to this dilemma.
These racks are designed to maximize storage in minimal spaces, keeping boots accessible and in good condition. Below, we explore various space-saving boot rack solutions that cater to different needs and living spaces.
Over-the-Door Boot Racks
Over-the-door boot racks are a brilliant solution for those who are short on floor space. These racks hang over the door and can accommodate several pairs of boots, utilizing the often overlooked storage space behind doors. They’re easy to install and remove, making them ideal for renters or anyone looking to add storage without permanent fixtures.
Under-Bed Boot Organizers
For those who prefer out-of-sight storage, under-bed boot organizers are perfect. These flat storage solutions slide under the bed and can hold multiple pairs of boots, protecting them from dust while keeping them easily accessible. They’re a great option for keeping seasonal boots stored away during the off-season.
Wall-Mounted Boot Racks
Wall-mounted boot racks utilize vertical space, freeing up floor area. These racks can be installed at any height, making them versatile for storage in closets, mudrooms, or entryways. They provide a neat display for your boots and can be customized to hold as many pairs as needed.
Stackable Boot Boxes
Stackable boot boxes offer a modular approach to boot storage. Made from clear plastic or durable cardboard, these boxes protect boots from dust and damage while allowing for easy visibility. Stackable designs make it easy to build upward, optimizing vertical space in closets or corners.
Boot Hangers
Boot hangers are an innovative solution for hanging boots in closets. These specialized hangers clip onto the tops of boots, allowing them to hang from a rod, similar to clothes. This method keeps boots off the floor, prevents creasing, and maximizes closet space.
Retractable Boot Racks
Retractable boot racks are designed for flexibility, with panels that slide out or fold away when not in use. This feature makes them ideal for small spaces, as they can be extended for access to boots and retracted to save space when needed.
Choosing the right space-saving boot rack depends on your specific needs, the amount of space available, and the number of boots you need to store. Whether you opt for an over-the-door rack, an under-bed organizer, or a wall-mounted solution, the goal is to keep your boots organized, accessible, and in good shape. With the right storage solution, you can free up valuable space and keep your living area clutter-free.
FAQ on DIY Boot Rack DIY project
- How can I customize this DIY boot rack for my space?
- You can adjust the length of the rack by cutting your 2×4s and 1×4s shorter or longer. You can also change the number of dowels and their spacing to fit more or fewer pairs of boots. Finally, choose a paint or stain color that matches your mudroom, entryway, or garage.
- How many pairs of boots will this rack hold?
- With 16 one‑foot dowels, this design typically holds around 8 pairs of boots, depending on size and style. You can increase capacity by extending the length of the rack or adding a second row of dowels at a different height.
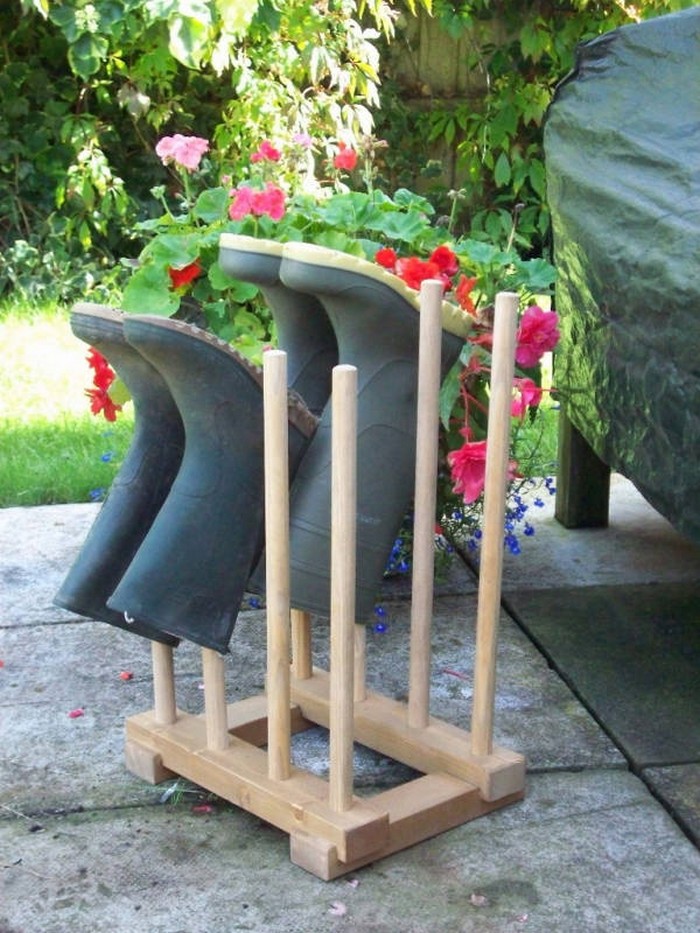
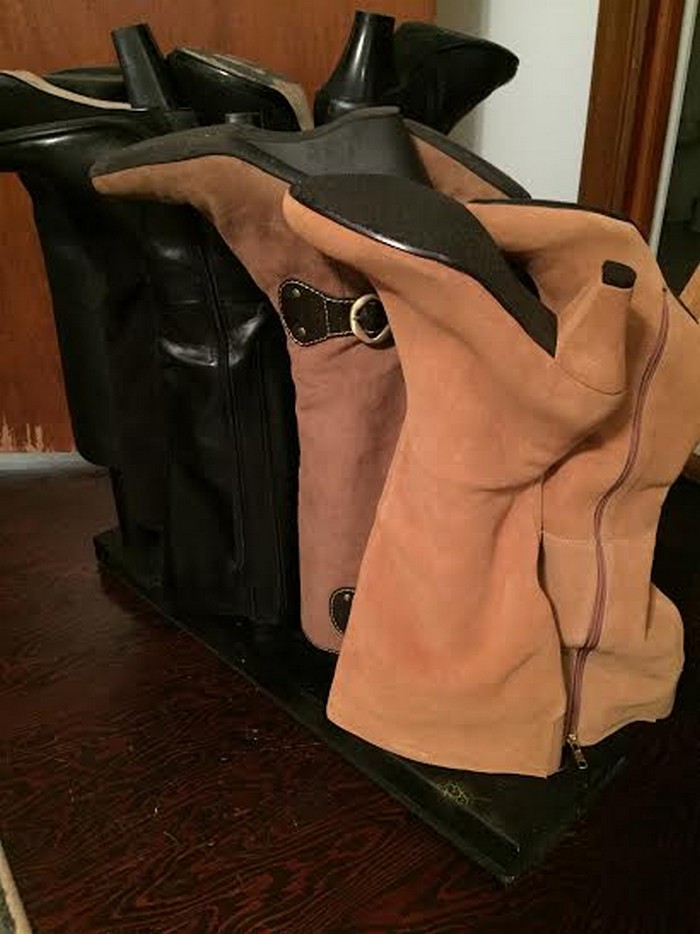
- Can this rack handle heavy boots like welly and leather boots?
- Yes – as long as you use sturdy lumber, solid dowels or PVC, and quality screws, this rack can hold tall rubber wellies, leather work boots, and winter boots. Make sure your dowels are firmly secured and avoid overloading beyond the number of dowels provided.
- How do I keep my boot rack looking good over time?
- Wipe it down regularly, clean up mud or spills right away, avoid overloading the dowels, and check the screws periodically. When the paint or sealer starts to fade, lightly sand and apply a fresh coat of exterior finish.
- Is it difficult to build this boot rack?
- This is a beginner‑friendly woodworking project if you’re comfortable using a saw and drill. With clear measurements and step‑by‑step instructions, most DIYers can complete the build in an afternoon and paint it the same day.
Conclusion
A DIY boot rack is an efficient and cost-efficient way of organizing everyone’s foot gear. Using our comprehensive guide ensures a rack that can last for a long time while bearing your own style.
For more ways to organize your home, check out our DIY diagonal bookshelf project!