Last Updated on December 11, 2025 by teamobn
Do you want a unique backyard barbecue that doubles as a conversation piece? A DIY beer keg grill is a great way to recycle an old keg and turn it into a custom charcoal grill.
This guide explains what a beer keg grill is, how to build one in clear steps, and how to use it safely. It is written so that a senior high school graduate can follow along.
Contents
- 1 Quick Answer: How Do You Make a Beer Keg Grill?
- 2 Project Overview
- 3 What Is a Beer Keg Grill
- 4 Is It Legal And Safe To Use A Beer Keg As A Grill
- 5 Building a Beer Keg Grill
- 5.1 How To Build A Beer Keg Grill Step By Step
- 5.1.1 Step 1: Depressurize And Clean The Keg
- 5.1.2 Step 2: Mark The Lid Opening
- 5.1.3 Step 3: Cut The Lid With An Angle Grinder
- 5.1.4 Step 4: Smooth Sharp Edges
- 5.1.5 Step 5: Attach The Hinge And Lid Handle
- 5.1.6 Step 6: Install Grate Supports, Vents, And Charcoal Area
- 5.1.7 Step 7: Test, Season, And Start Grilling
- 5.2 Beer Keg Grill Ideas
- 6 Safety Tips for Working with Metal and Tools
- 7 Maintenance and Cleaning Tips
- 8 Conclusion
Quick Answer: How Do You Make a Beer Keg Grill?
To make a beer keg grill, you safely depressurize and clean an old stainless steel beer keg, mark and cut a lid with an angle grinder, then smooth the edges. Next, you attach a hinge and handle, install supports for a store-bought grill grate, add air vents and a charcoal basket, and finally season the grill with a hot burn before cooking.
Project Overview
- Project difficulty: Intermediate
- Skills needed: Comfortable with an angle grinder and drill, basic welding is helpful
- Estimated time: 4 to 6 hours once you have all the parts
- Estimated cost: About 50 to 150 US dollars depending on the price of the keg and materials
What Is a Beer Keg Grill
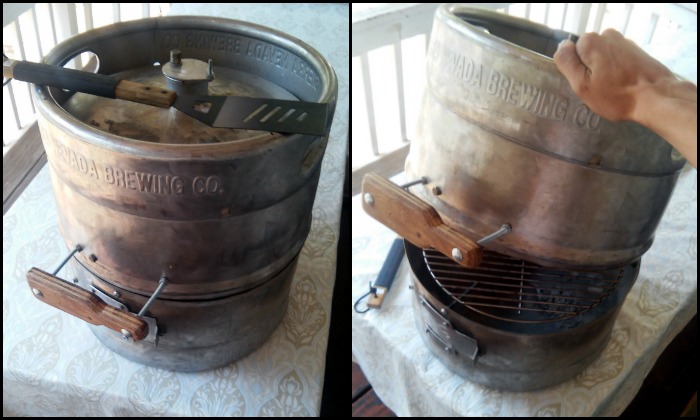
A beer keg grill is a charcoal barbecue that you build from an old metal beer keg. Breweries and bars use kegs to store and serve beer. Most kegs are made from stainless steel or aluminum, and they are strong enough to be reused many times.
When a keg is retired and no longer needed, you can repurpose it into a grill. You cut the keg open, add a lid, grate supports, and vents. The result is a compact, durable grill that is perfect for backyard cookouts or camping trips.
Is It Legal And Safe To Use A Beer Keg As A Grill
Before you start any project that uses a beer keg, you must get the keg legally and make sure it is safe to cut.
Ownership and Legality
Beer kegs are usually the property of breweries. They are part of the brewery’s equipment and are expensive. Taking a keg without permission is illegal, even if you paid a deposit at a store.
To stay on the right side of the law:
- Ask your local brewery, bar, or distributor if they have damaged or retired kegs for sale
- Get proof that the keg is no longer their property
- Keep any receipt or written confirmation
Safety and Depressurizing
A sealed keg can be dangerous if you cut into it while it still has pressure inside. Before cutting:
- Confirm that the keg is completely empty
- Make sure it is fully depressurized
- Ask someone with keg or brewing experience if you are unsure
If you do not know how to depressurize a keg safely, do not guess. Ask for help from someone who does. Never cut a pressurized keg.
Important safety note
Cutting metal with power tools can be dangerous. Always wear protective gear, work in a safe area, and do not rush. If you are not comfortable with metalwork or welding, ask an experienced friend or a professional for help.
Building a Beer Keg Grill
For more step-by-step information on how you can turn a beer keg into this featured DIY grill project, head over to the tutorial linked below!
Materials
- Old beer keg
- Heavy-duty steel door hinge
- Scrap steel stock for grate supports and legs if needed
- Scrap aluminum plate or steel plate for brackets and vents
- Small bolts and washers in various sizes
- Store-bought grill grate that fits the keg opening
- High-temperature paint for grills (optional)
- Wooden or metal handle for the lid
Tools
- Angle grinder with cutting wheel and abrasive wheel
- Drill with metal drill bits
- Files for smoothing sharp edges
- Manual shear or metal snips (optional for thin plates)
- MIG welder or other welder if you plan to weld parts
- Bandsaw for cutting metal stock (optional)
- Welding magnets for holding parts during welding
- Vice grip pliers and clamps
- Measuring tape, marker, and straight edge
How To Build A Beer Keg Grill Step By Step
These steps are a practical summary of the process many DIY builders, including Ilpug, use to turn a keg into a working grill.
Step 1: Depressurize And Clean The Keg
- Confirm that the keg is no longer in use and is legally yours
- Use the keg valve to carefully release any remaining pressure
- Remove the spear or internal parts if possible, following proper keg instructions
- Rinse the inside several times with warm, soapy water
- Let the keg drain and dry
The keg should be clean and free of pressure before you move to any cutting.
Step 2: Mark The Lid Opening
- Decide whether you want the lid to open horizontally like a clamshell or vertically like a smoker
- Use masking tape and a marker to outline the lid shape on the curved side of the keg
- Leave strong metal strips on each side to support the hinge and handle
- Mark where the hinge will sit and where the handle will go
Clear markings will help you get a straight and even cut with the angle grinder.
Step 3: Cut The Lid With An Angle Grinder
- Put on safety goggles, heavy gloves, long sleeves, and ear protection
- Secure the keg in a sturdy position with clamps or a vise so it cannot roll
- Use the angle grinder with a cutting disc to slowly follow your marked line
- Cut around the lid outline until the piece comes free
- Set the lid aside and let the metal cool
Work slowly and keep your body out of the direct cutting path to reduce the risk of injury.
Step 4: Smooth Sharp Edges
- Switch to a grinding or flap disc on the angle grinder
- Carefully smooth all cut edges on both the keg body and the lid
- Use metal files to remove any small burrs and sharp spots
- Run a gloved hand lightly along the edge to check for rough spots
This step reduces the chance of cuts when you use or clean the grill.
Step 5: Attach The Hinge And Lid Handle
- Position the lid back on the opening so it lines up cleanly
- Clamp a heavy-duty steel door hinge in place at the back of the lid
- Weld the hinge to the lid and to the body of the keg, or drill holes and bolt it securely
- Attach a handle to the front of the lid with bolts, or weld on a metal handle
- Open and close the lid several times and adjust the hinge if needed
The lid should open and close smoothly without binding or scraping.
Step 6: Install Grate Supports, Vents, And Charcoal Area
- Grate supports
- Measure the inside diameter of the keg
- Weld or bolt short pieces of scrap steel or aluminum to the inside walls at an even height
- Make sure they form a stable ledge for your store-bought grill grate
- Charcoal basket or grate
- Use a scrap steel plate or expanded metal to build a simple charcoal tray
- Raise the charcoal off the bottom so air can flow under it
- Place or attach this tray near the bottom of the keg
- Air vents
- Mark small vent openings near the bottom for air intake
- Cut them with the angle grinder
- Make simple sliding covers or rotating plates to open or close the vents
- Optionally add a small vent on the lid for smoke control
Good airflow helps your charcoal burn evenly and gives you better temperature control.
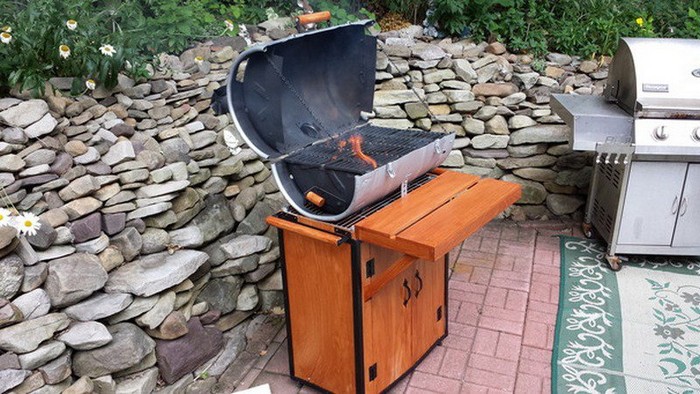
Step 7: Test, Season, And Start Grilling
- Check all welds and bolts to make sure the grill is solid and stable
- Rinse or wipe the inside one more time to remove any grinding dust
- Light a full load of charcoal and let the grill run hot for 30 to 60 minutes
- During this first burn, keep food off the grill and let any remaining oils or residues burn off
- Lightly oil the grill grate and heat it again to season the metal
- After the grill cools, it is ready for your first real barbecue
This first hot burn improves safety and gives your new beer keg grill a cleaner taste.
You can get step-by-step instructions from ilpug over here…
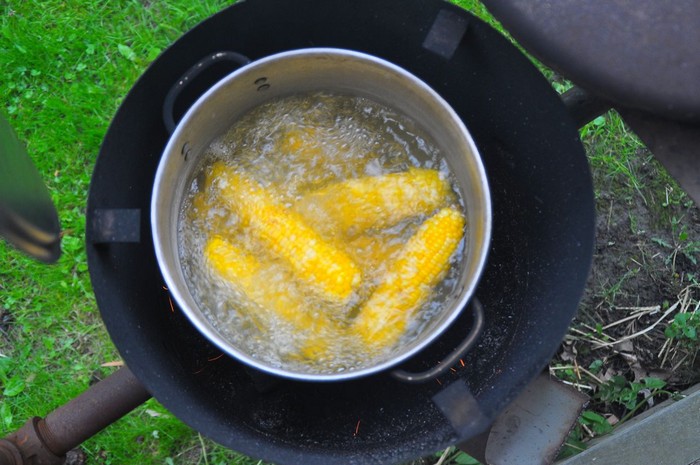
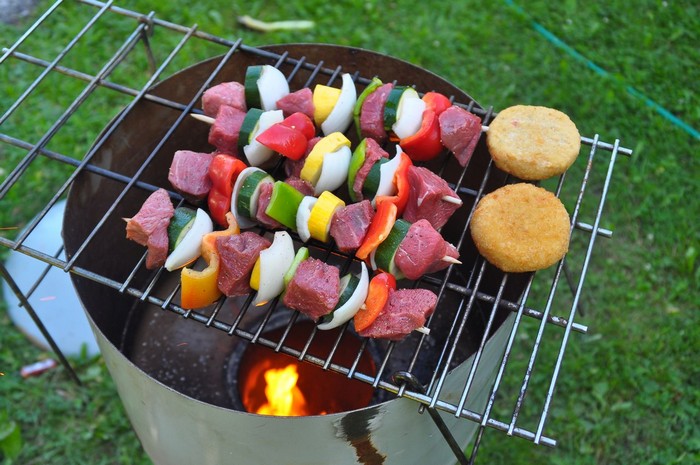
Beer Keg Grill Ideas
Click on any image to start the lightbox display. Use your Esc key to close the lightbox.
Beer Keg BBQ Grill Station
If you want to get the most out of your beer keg, consider using it to create a BBQ grill station. By cutting the keg in half vertically, you’ll create a larger grilling surface that will come in handy for outdoor barbecue parties. Plus, this method will give your guests more room to move around and enjoy the festivities.
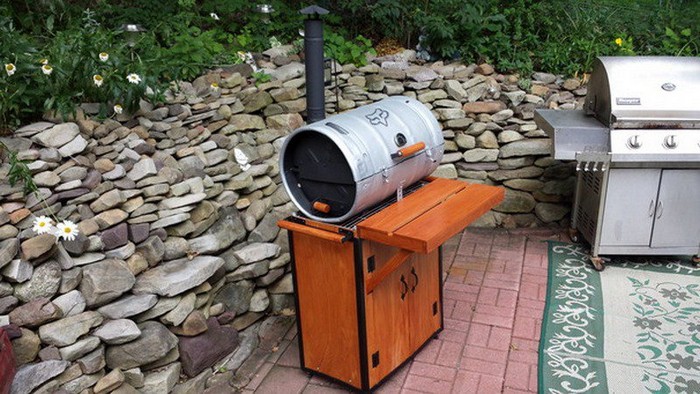

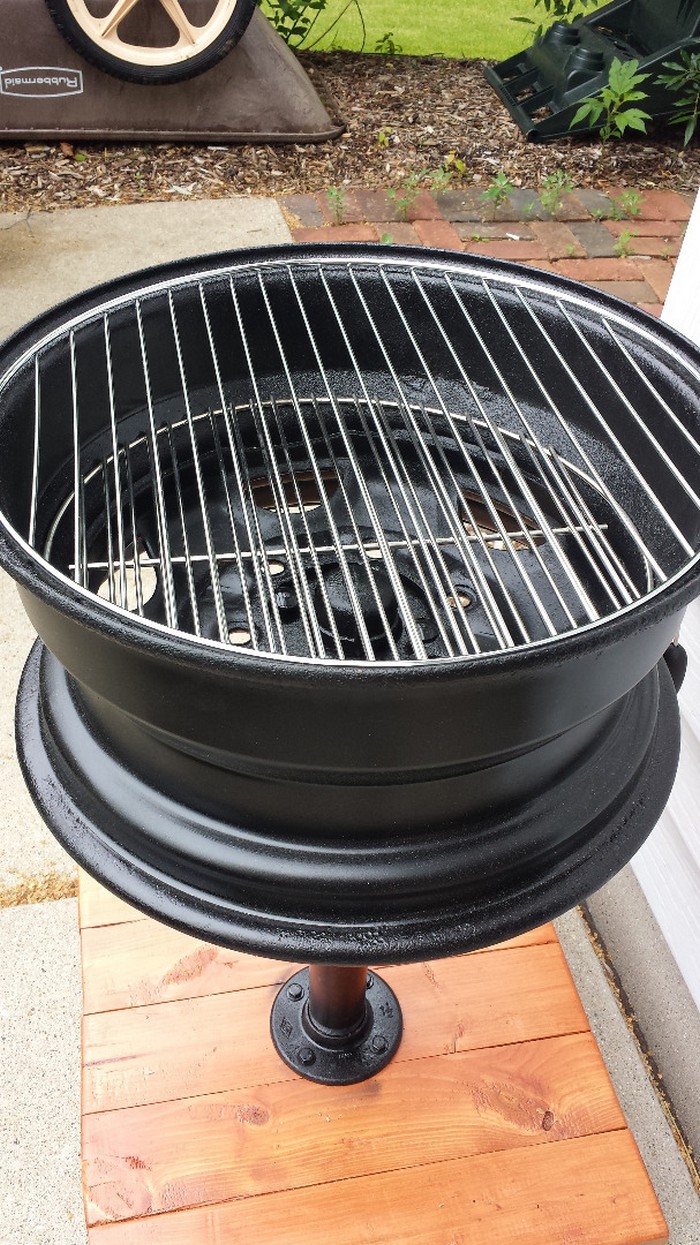
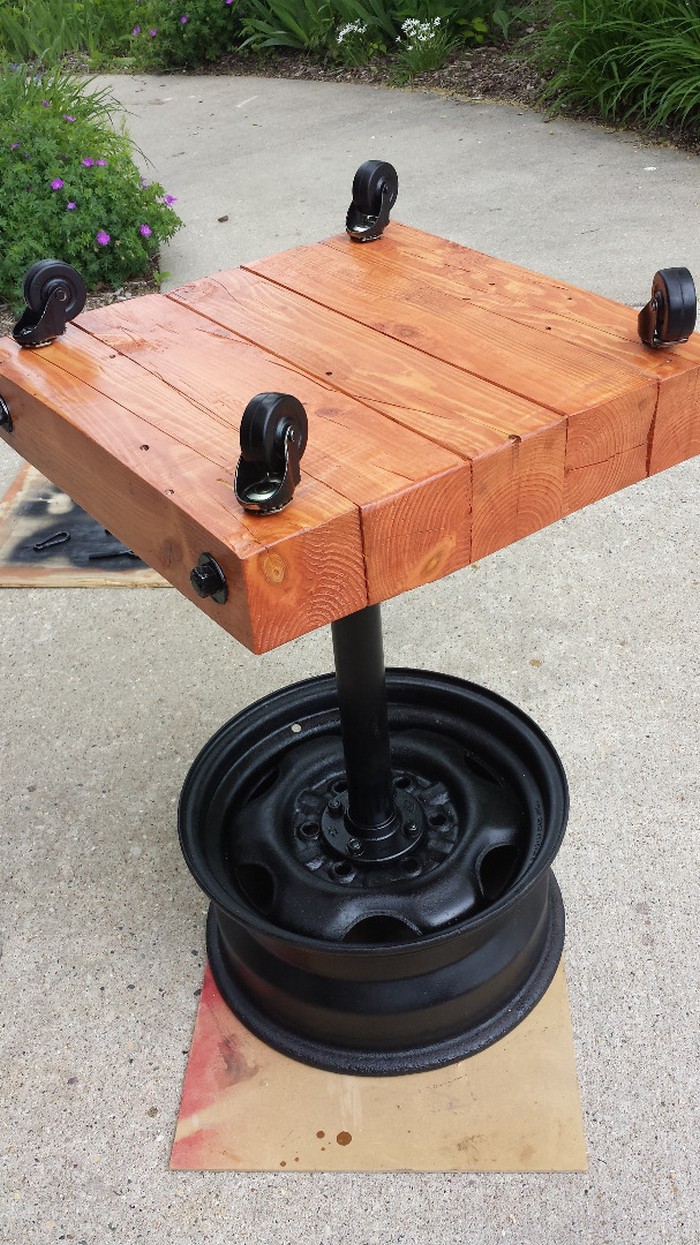
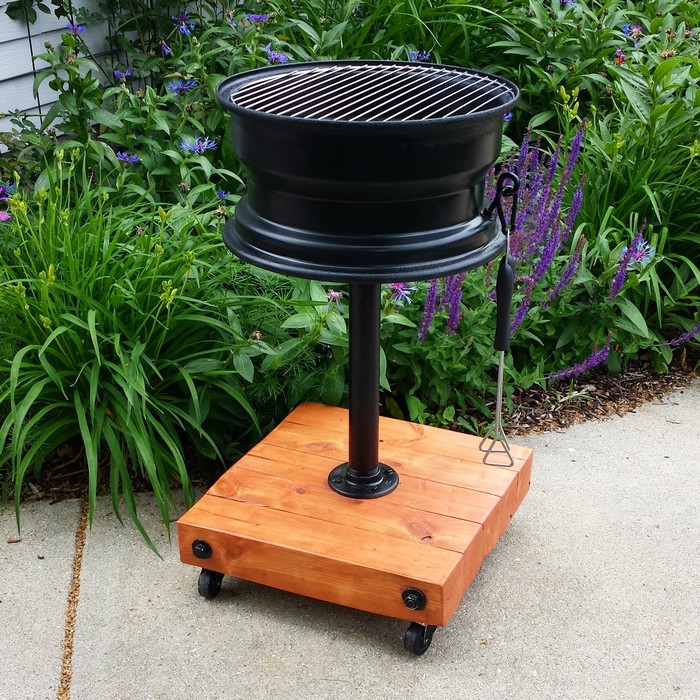
If you’re looking for a creative and unique way to spruce up your backyard this summer, why not try a DIY no-weld tire rim grill? This project is perfect for anyone who doesn’t know how to weld, and it’s a great way to upcycle an old tire rim.
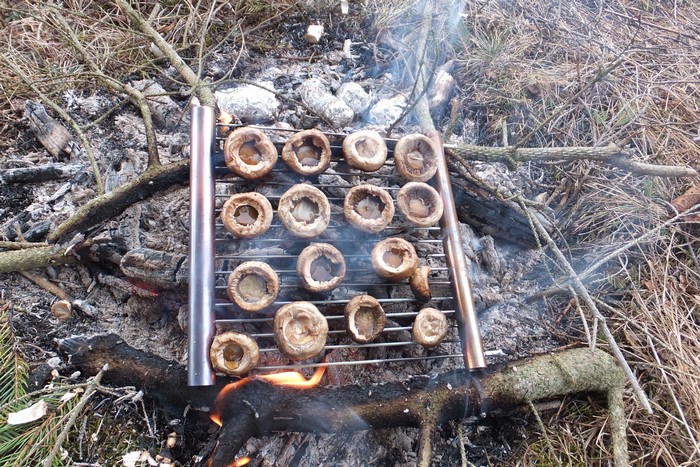
A DIY Rocket Grill is a type of grill that is typically made from a metal can or other type of container. The name comes from the fact that the grill resembles a rocket ship. Rocket grills are popular among campers and those who enjoy outdoor cooking, as they are easy to make and use.

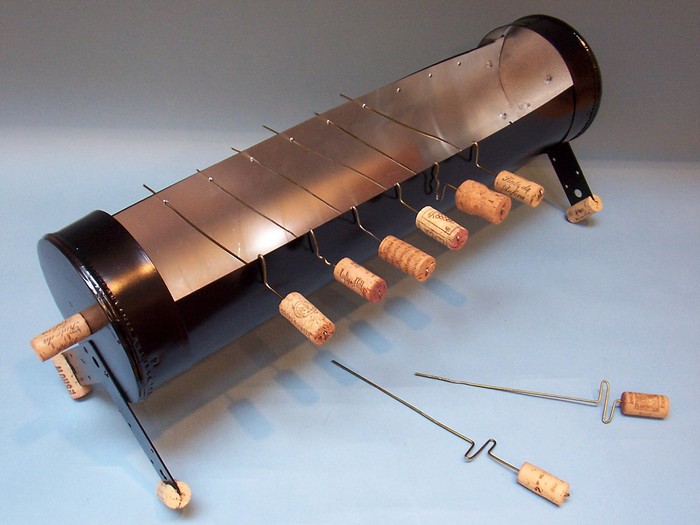
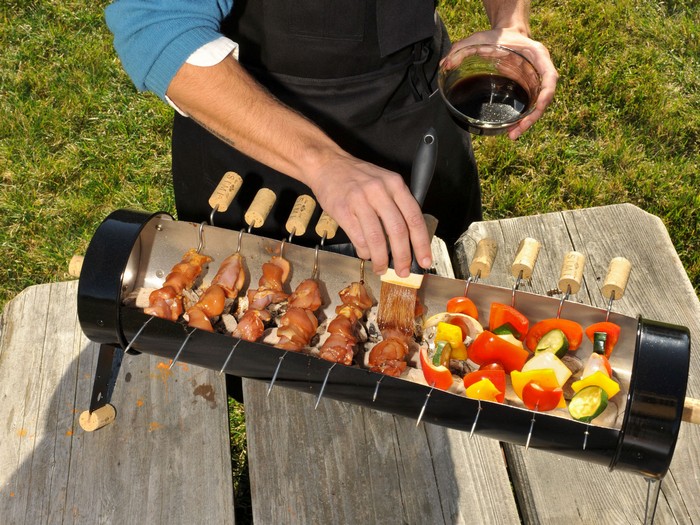
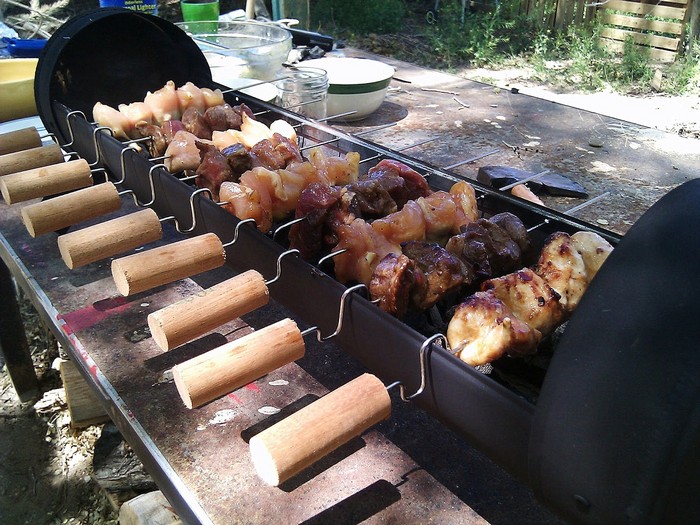
A Yakitori Grill is a Japanese style grill that is perfect for grilling skewers of meat or vegetables. It is a great way to enjoy a healthy and delicious meal with friends or family. Yakitori grills are typically made of stainless steel or iron and have a wire mesh grill surface.
This type of grill is perfect for those who enjoy DIY cooking, as it is easy to set up and use. Yakitori grills are a great way to cook a variety of foods, and they can be used for both indoor and outdoor cooking.
This is a small, portable grill that is perfect for cooking on the go. It is easy to set up and take down, and can be used with either charcoal or gas. Pocket grills are great for camping, tailgating, or anytime you want to enjoy a delicious grilled meal.
Safety Tips for Working with Metal and Tools
Building a beer keg grill is a fun project, but working with metal and power tools always requires care.
Wear protective gear
- Safety goggles to protect your eyes from sparks and debris
- Heavy duty gloves to protect your hands from sharp edges and hot metal
- Ear protection when using loud tools
- Long sleeve shirts and long pants made from thick material
Use tools correctly
- Read the safety instructions for each tool before you use it
- Inspect tools for damaged cords, loose guards, or worn discs
- Clamp the keg firmly so it does not move while you cut or drill
- Keep both hands on the tool when grinding or cutting
Keep a safe workspace
- Work outdoors or in a well ventilated area
- Keep flammable items away from sparks
- Make sure the floor is clear so you do not trip while holding a tool
- Keep children and pets away while you work
Stay focused
- Do not use power tools if you are tired, upset, or distracted
- Take breaks if your hands or eyes feel strained
- Double check measurements and markings before making cuts
Good safety habits help you enjoy the project and your new grill for years to come. Safety is crucial to making sure that your DIY beer keg grill is both fun and rewarding.
Maintenance and Cleaning Tips
Good care will keep your beer keg grill looking great and working well.
Regular Cleaning
- After each use, let the grill cool down
- Brush loose food and ash from the grates with a grill brush
- Wash the grates with warm water and mild dish soap, then rinse and dry
- Wipe the outside of the keg with a damp cloth and mild soap to remove grease and smoke stains
Deep Cleaning
Once or twice a season, give your grill a deeper clean.
- Remove the grates and charcoal tray
- Soak them in warm water with a degreaser or grill cleaner
- Scrub the inside of the keg with a wire brush or scraper to remove built up carbon
- Rinse all parts and let everything dry before reassembly
Preventing Rust
Stainless steel and aluminum resist rust, but it is still important to protect them.
- Store the grill in a dry place or cover it with a weather resistant grill cover
- Lightly oil the grates after cleaning to prevent rust and reduce sticking
- Touch up any scratched painted areas with high temperature grill paint if you use it
Regular Inspection
If you ever add gas components, inspect hoses and fittings before every use.
DIY Beer Keg Grill Frequently Asked Questions
- Is it safe to cook on a beer keg grill?
- Yes, it can be safe if you use a stainless steel or food grade aluminum keg that has only held beer. Make sure the keg is fully depressurized, cleaned, and burned off at high heat before you cook on it. Never use a keg that has held chemicals or unknown liquids.
- Do I need welding skills to build a beer keg grill?
- Welding makes the grill stronger and often looks cleaner, but you can build a simple version with bolts, brackets, and strong hardware. You still need to be comfortable using an angle grinder and drill.
- Can I use propane with a beer keg grill?
- Most DIY beer keg grills are designed for charcoal. Converting one to propane requires proper burners, regulators, and gas safe fittings. Gas leaks can be very dangerous. If you want to use propane, work with a qualified person and follow local codes.
- Where can I get an old beer keg legally?
- Talk to local breweries, bars, or beverage distributors. Some will sell damaged or retired kegs for scrap or to DIY builders. Ask for written proof that the keg is no longer their property and keep any receipt.
- How long will a beer keg grill last?
- A beer keg grill made from stainless steel and cared for properly can last many years. Regular cleaning, protection from the weather, and fast repair of any damage will greatly extend its life.
Conclusion
Building a beer keg grill offers a unique and rewarding DIY project that enhances any outdoor gathering. With careful attention to safety, maintenance, and proper use, this custom grill can provide years of reliable service and become a conversation piece at your barbecues. Embrace the process, and enjoy crafting a functional piece of art that reflects your craftsmanship and love for grilling.
We have more cool grilling solutions for your outdoor area. Check out our outdoor grill island project next!