Last Updated on December 1, 2025 by teamobn
Bowling is a fun activity for all ages. You can play with friends and family, and you do not need to be an expert to enjoy it. The downside is that a trip to a commercial bowling alley can be expensive and requires planning.
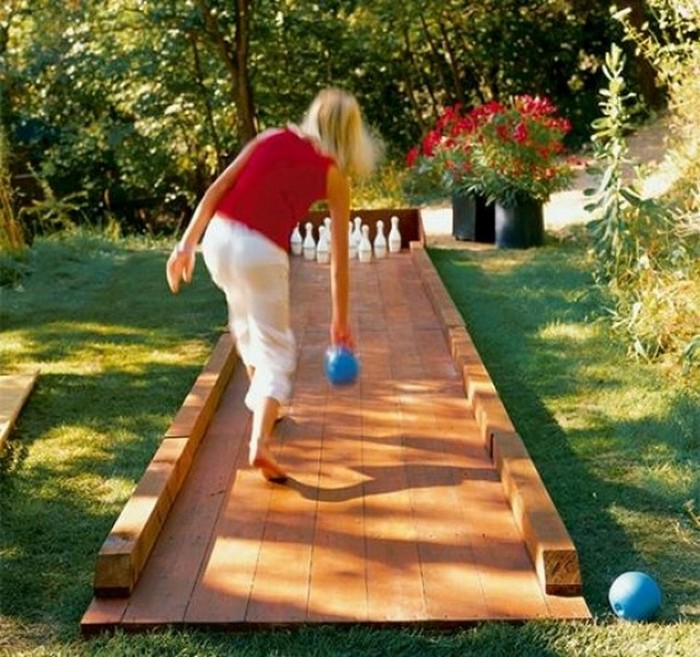
If you have some space behind your house, you can build your own DIY backyard bowling alley. This simple project gives you a private outdoor bowling lane that you can use any time you like. It is perfect for family game nights, parties, or casual weekend fun.
This guide explains how to build a basic backyard bowling alley in 10 clear steps using common tools and materials.
Whether you want a simple family game lane or a more polished backyard bowling alley, this guide shows you exactly how to plan, build, and maintain your own outdoor lane.
Contents
- 1 At a Glance: How to Build a Backyard DIY Bowling Alley
- 2 Backyard DIY Bowling Alley
- 2.1 What Materials Do You Need for a Backyard DIY Bowling Alley?
- 2.2 What Tools Do You Need to Build a Backyard DIY Bowling Alley?
- 2.3 How to Build a Backyard Bowling Alley: Step-By-Step Instructions
- 2.3.1 Step 1: Design and Plan Your Layout
- 2.3.2 Step 2: Prepare the Foundation
- 2.3.3 Step 3: Build the Wooden Frame
- 2.3.4 Step 4: Lay the Plywood Base
- 2.3.5 Step 5: Install the Lane Surface
- 2.3.6 Step 6: Add the Rubber Mat Approach Area
- 2.3.7 Step 7: Set Up the Pin Reset and Pulley System
- 2.3.8 Step 8: Add Lighting for Evening Games
- 2.3.9 Step 9: Mark the Bowling Lane
- 2.3.10 Step 10: Test and Enjoy Your Backyard Bowling Alley
- 3 Seating and Spectator Areas for Your Backyard Bowling Alley
- 4 What Surface Should You Use for a Backyard Bowling Alley?
- 5 FAQ: Outdoor Bowling Alley
- 6 Conclusion
At a Glance: How to Build a Backyard DIY Bowling Alley
To build a DIY backyard bowling alley, you will create a straight wooden frame, add a smooth surface inside it, and set up a simple pin reset system. Most people can complete a basic lane in one weekend with standard tools.
Typical Details
- Time: 1 to 2 days
- Difficulty: Intermediate DIY
- Estimated cost: Around 200 to 600 dollars, depending on length and materials
- Recommended lane length: 30 to 60 feet
- Recommended lane width: About 3 to 4 feet
Basic Steps
- Measure your space and decide on lane length and width.
- Clear and level the ground where the lane will sit.
- Build a wooden frame from 2×6 boards.
- Lay plywood sheets inside the frame as a solid base.
- Add laminate flooring or another smooth surface on top.
- Place a rubber mat at the start of the lane for bowlers to stand on.
- Install a simple rope and pulley pin reset system.
- Add outdoor lighting so you can play at night.
- Mark the foul line and lane markings with tape or paint.
- Test the lane, make small adjustments, and enjoy your backyard bowling alley.
Before You Start: Space, Safety, and Preparation
A little planning will make your DIY backyard bowling alley safer and more enjoyable.
Check Your Space
- Make sure you have a straight, open area that is at least 30 feet long and 3 to 4 feet wide.
- Avoid low spots where rainwater collects. Standing water can damage wood and make the lane slippery.
Think About Rules and Neighbors
- In most places, a simple wooden lane does not need a building permit.
- It is still a good idea to check for any local rules about permanent structures, noise, or lighting.
- Talk to your neighbors if the lane is close to a fence and you plan to play at night.
Focus on Safety
- Wear eye protection when cutting wood.
- Use ear protection when using loud power tools.
- Keep children and pets away from the work area during construction.
- If you need to dig, contact local services to check for buried cables or pipes.
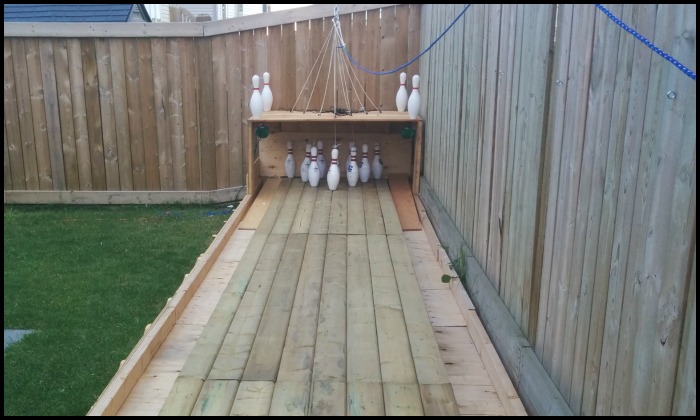
Backyard DIY Bowling Alley
Building a backyard bowling alley is easier than it looks. Once you’ve prepared your space and gathered your materials, the next steps simply walk you through assembling the frame, creating a smooth rolling surface, and setting up the pins so the lane works just like a smaller, outdoor version of the real thing.
With a bit of patience and a free weekend, you’ll be rolling strikes right at home, no reservations, rental shoes, or long lines required.
What Materials Do You Need for a Backyard DIY Bowling Alley?
You can adjust some of these materials to match your budget and space, but the list below is a good starting point.
- 2×6 deck boards (for the frame)
- 4×8 sheets of 3/4 inch plywood (for the base)
- Laminate flooring or another smooth surface material
- Rubber mat (for the approach area where players stand)
- Deck screws
- Strong string or cord
- Eye hooks
- Rope
- Pulley hardware system (for manual pin reset)
- Outdoor lighting (weatherproof)
- Optional: exterior paint or sealant for wood protection
- Optional: outdoor turf or pavers around the lane
What Tools Do You Need to Build a Backyard DIY Bowling Alley?
Basic tools are enough for most backyard bowling lane projects.
- Measuring tape
- Table saw or circular saw
- Drill and drill bits
- Spirit level (2 feet or longer is helpful)
- Screwdriver or drill driver
- Pencil and straightedge or chalk line
- Safety glasses and hearing protection
How to Build a Backyard Bowling Alley: Step-By-Step Instructions
Step 1: Design and Plan Your Layout
- Measure the space where you want to build the lane.
- A full size bowling lane is about 41 inches wide and 60 feet long. For a backyard, you can choose lengths from 30 to 60 feet.
- Sketch a simple plan that shows:
- The lane
- The pin area at the far end
- The approach area where players stand
- Any seating or spectator areas on the sides
Decide on your final length and width before you buy materials. This will help you calculate how many boards and plywood sheets you need.
Step 2: Prepare the Foundation
- Clear the lane area of grass, roots, rocks, and debris.
- Use a long straight board and your spirit level to check for low or high spots.
- Add or remove soil until the ground is as flat and level as you can make it.
- Slightly sloped drainage away from the lane is helpful, but the lane itself should sit on a level foundation.
A solid, level base will make your backyard bowling alley roll straighter and last longer.
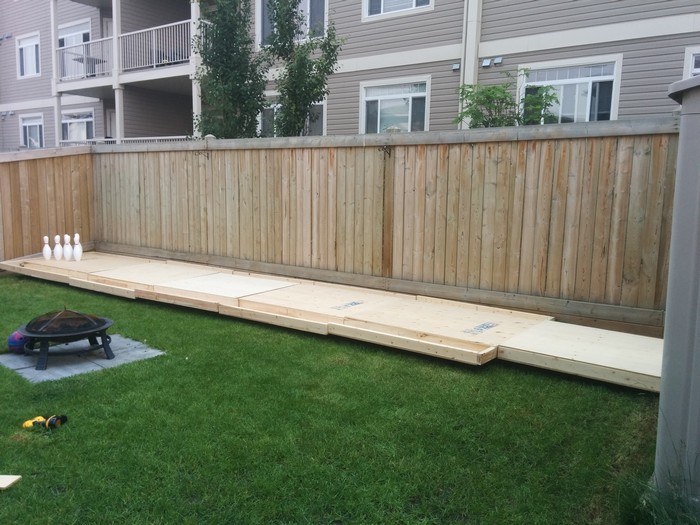
Step 3: Build the Wooden Frame
- Use 2×6 deck boards to build a long rectangular frame the same size as your planned lane.
- Place the boards on edge so they form raised sides.
- Secure the corners with deck screws.
- Add several cross braces between the two long sides of the frame to keep everything square and strong.
This frame supports the plywood and defines the shape of your bowling lane.
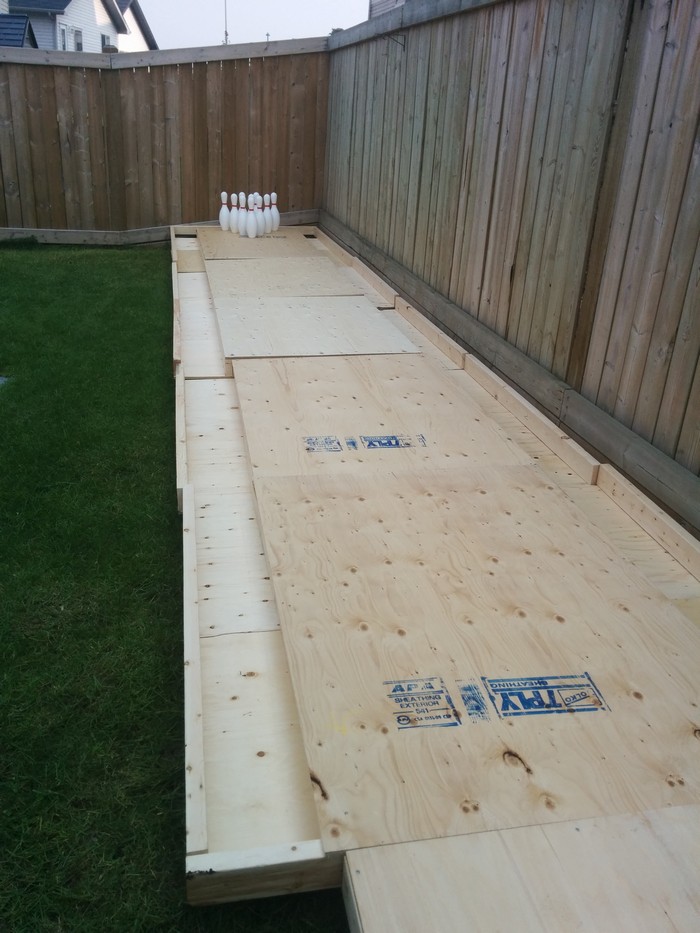
Step 4: Lay the Plywood Base
- Measure the inside of the frame and cut 4×8 plywood sheets to fit.
- Lay the plywood flat inside the frame.
- Use the spirit level to check that the surface is even. If you find gaps or uneven spots, adjust the base or add shims underneath.
- Secure the plywood to the frame and cross braces with deck screws.
You now have a solid, flat base for your backyard bowling alley.
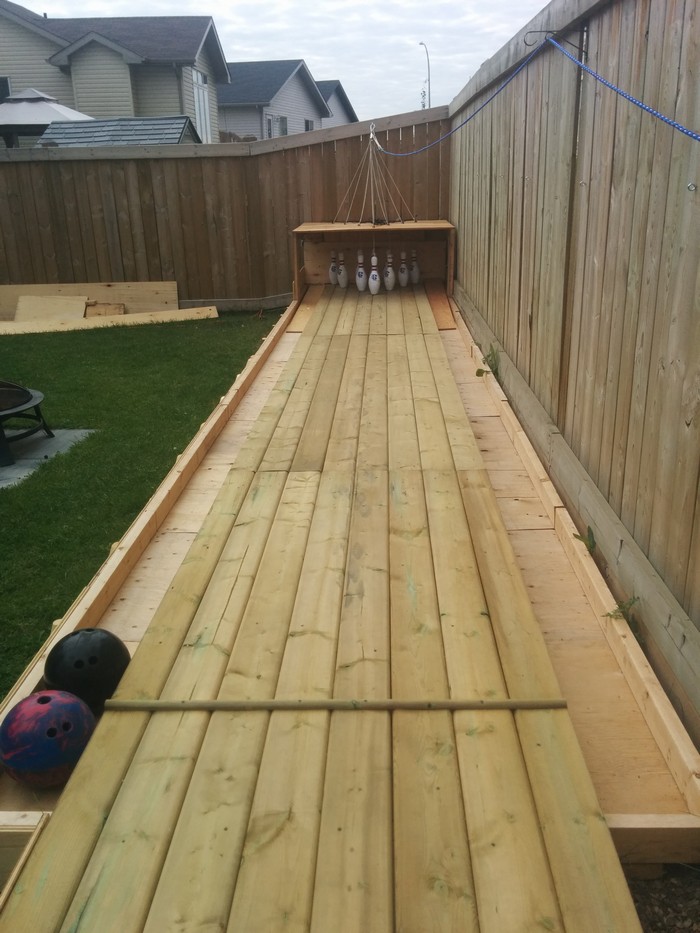
Step 5: Install the Lane Surface
- Cover the plywood with laminate flooring or another smooth surface.
- Follow the manufacturer’s instructions for installing laminate so the planks stay tight and flat.
- Make sure the surface is even and that there are no raised edges that could stop or deflect the ball.
Laminate flooring gives the ball a smooth roll and also protects the plywood from wear and moisture.
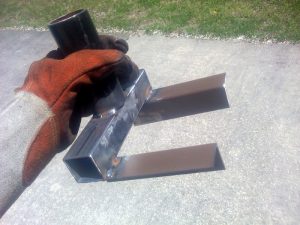
Step 6: Add the Rubber Mat Approach Area
- Place a rubber mat at the beginning of the lane where players will stand to bowl.
- The mat should cover a few feet before the start of the lane.
- This gives players a non slip surface and helps protect the lane from shoe marks and wear.
If needed, cut the mat to match the width of your lane.
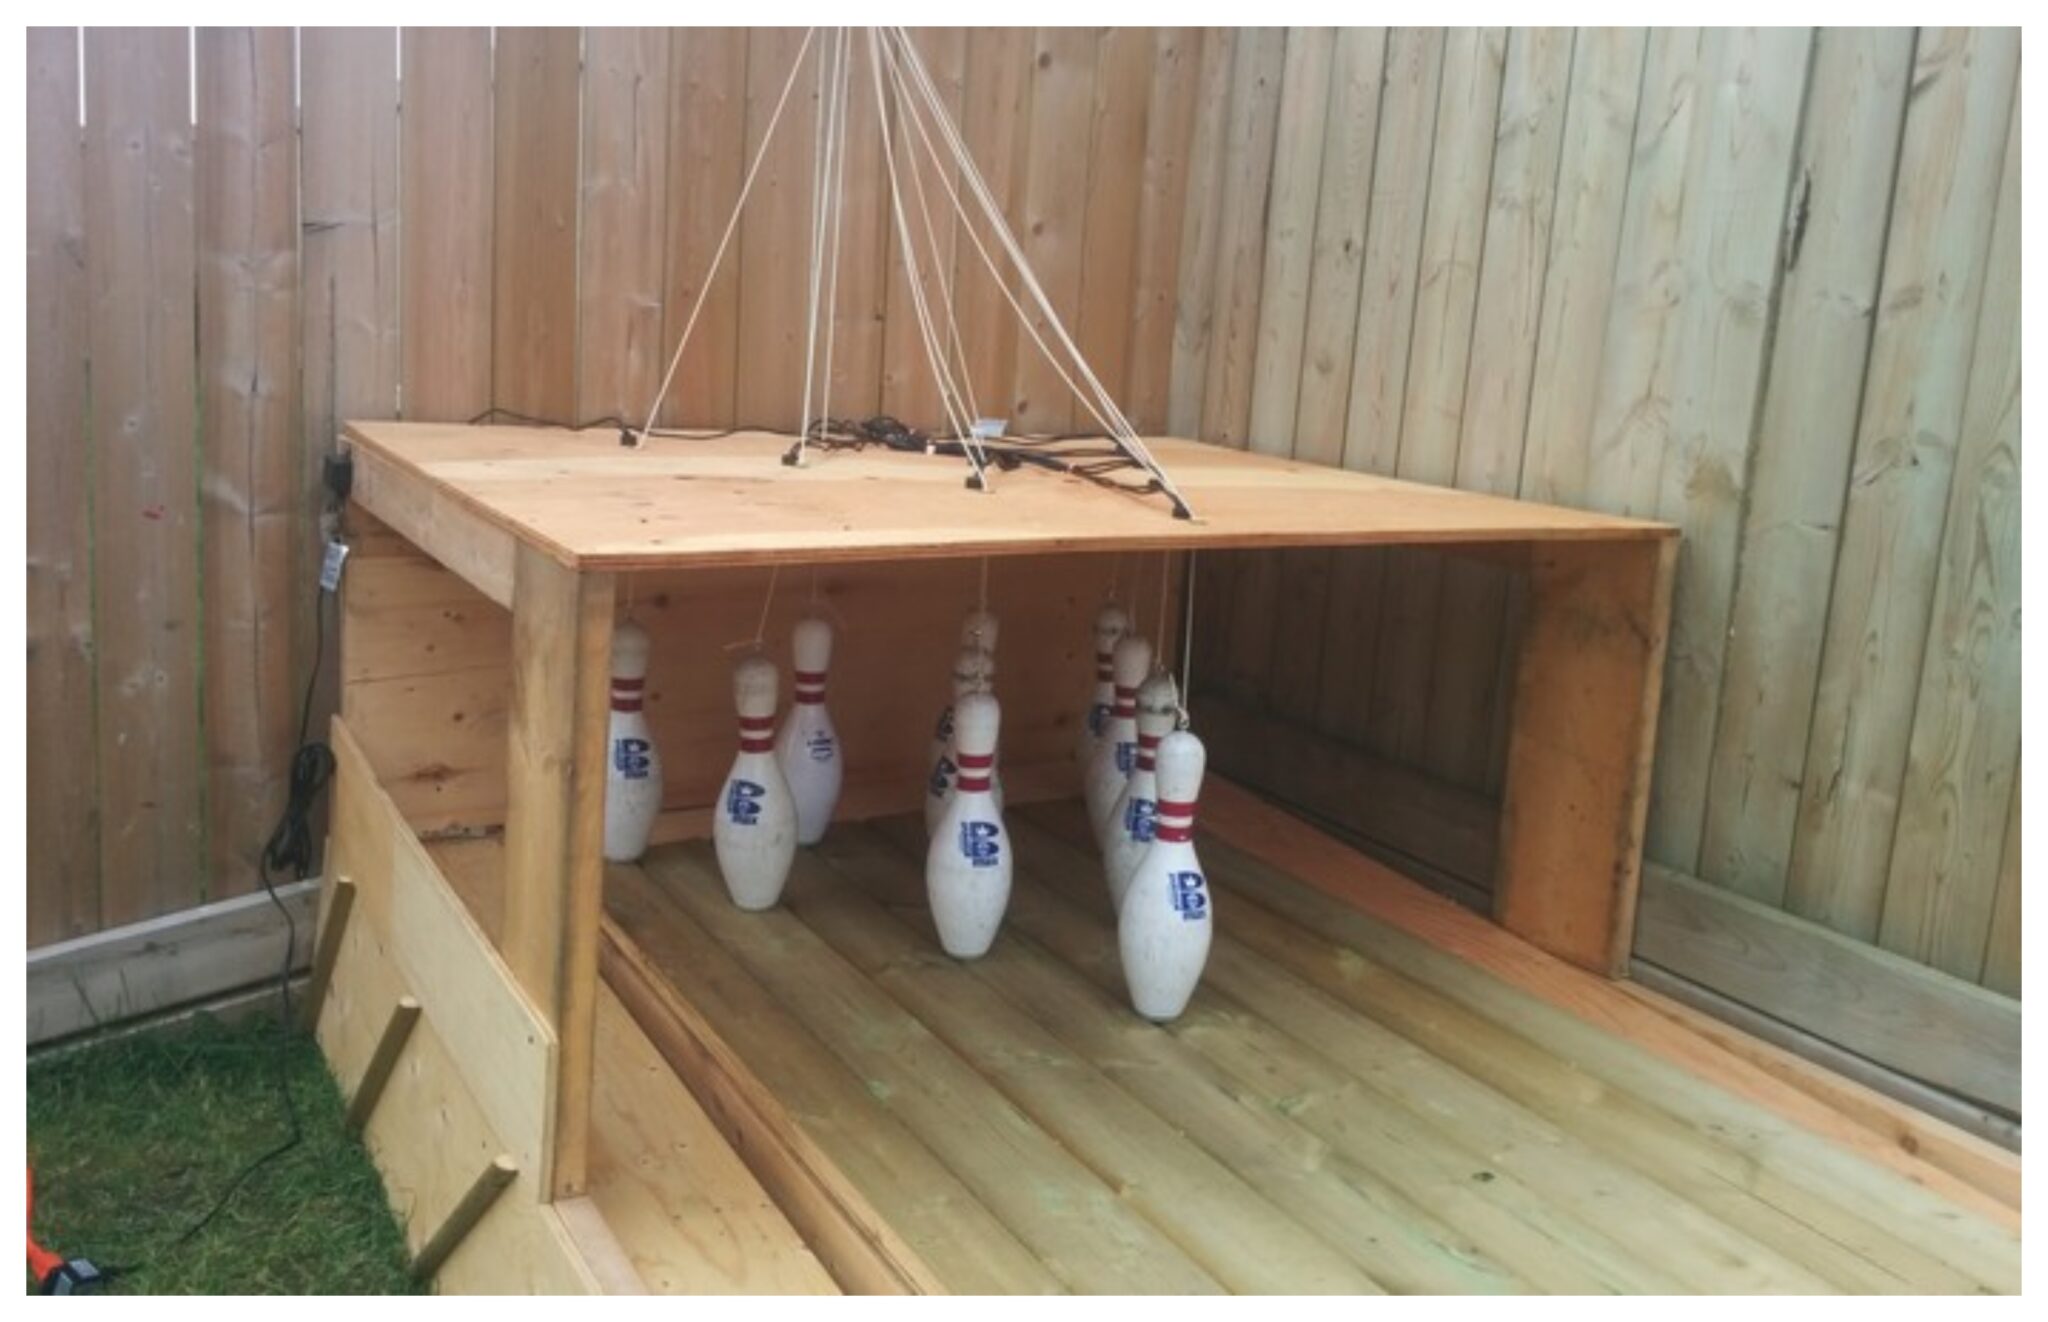
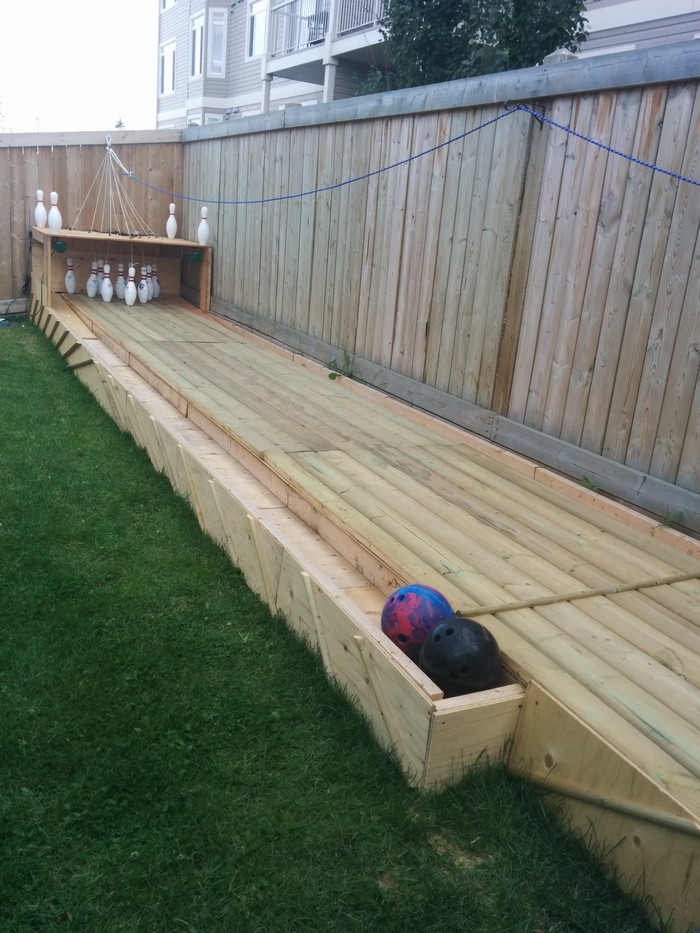
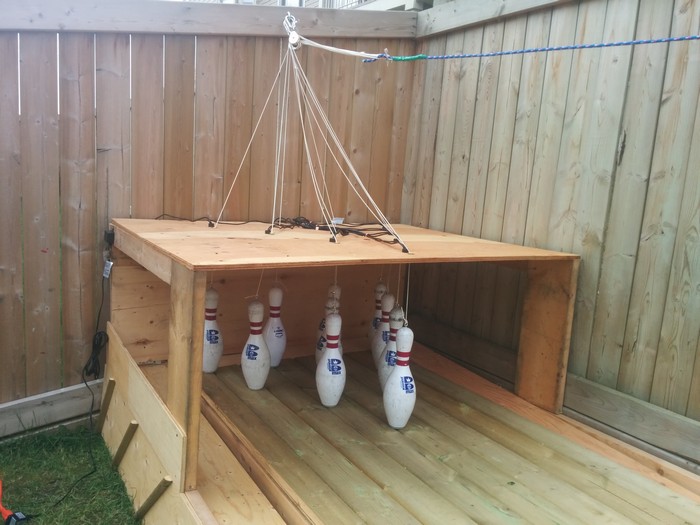
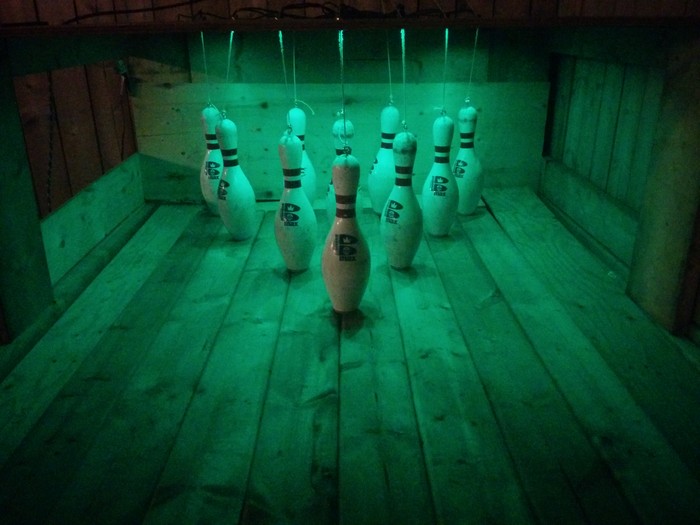
Step 7: Set Up the Pin Reset and Pulley System
- At the far end of the lane, mark the pin area where you will place your pins.
- Install eye hooks in sturdy spots at the back or sides of the frame.
- Attach rope to the pulley hardware and run it through the eye hooks.
- Tie strings to the pins and connect them to the rope system, or design a simple cradle that lifts all the pins together so you can reset them quickly after each turn.
With this manual pin reset system, you can pull the rope to lift and reset the pins without walking down the lane every time.
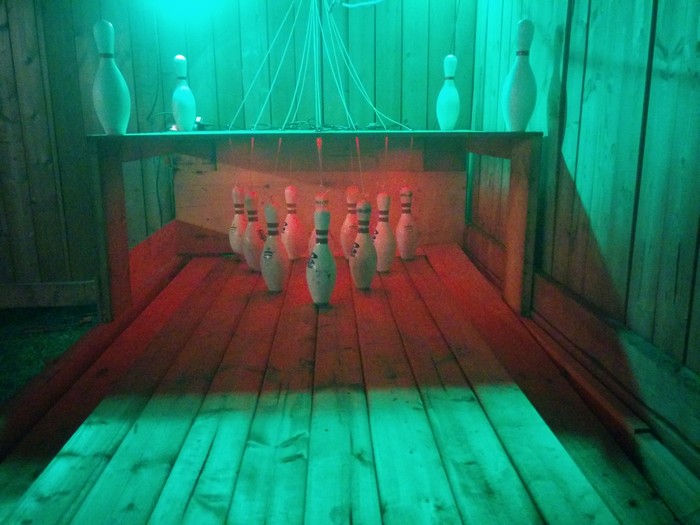
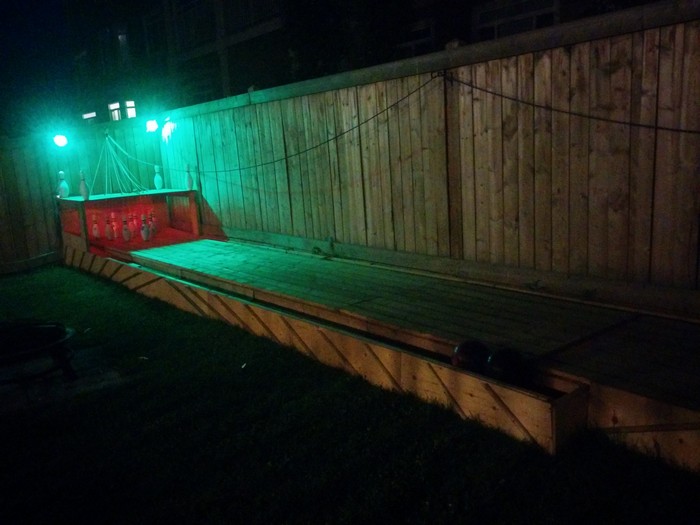
Step 8: Add Lighting for Evening Games
- Install weatherproof outdoor lights above or beside the lane.
- Aim for lighting that is bright enough to see the ball and pins clearly, but not so harsh that it shines into players’ eyes.
- You can use LED string lights, spotlights, or strip lights along the sides.
Good lighting makes your backyard bowling alley safe and fun to use after sunset.
Step 9: Mark the Bowling Lane
- Use tape or outdoor paint to mark:
- The foul line at the start of the lane
- Any aiming arrows or dots
- The pin positions at the far end
- You can also outline gutters or side boundaries if you want a more realistic bowling look.
Clear markings help players line up their shots and make the lane feel more complete.
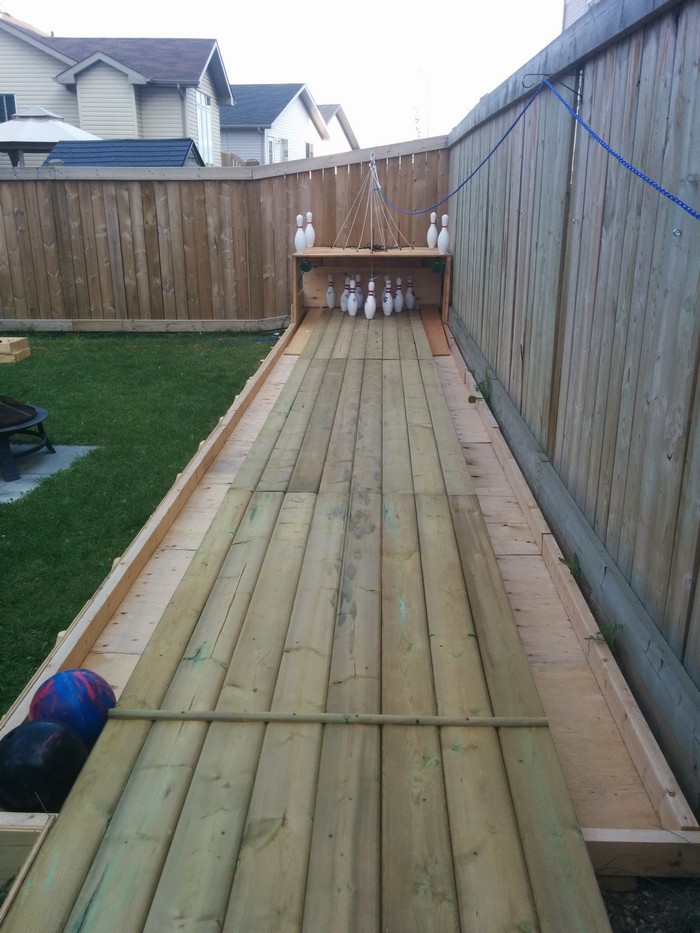
Step 10: Test and Enjoy Your Backyard Bowling Alley
- Roll a few balls down the lane and watch how they travel.
- Look for:
- Bumps or uneven spots
- Joints that catch the ball
- Loose boards or squeaks
- Tighten screws and adjust the surface until the ball rolls smoothly and straight.
Once you are happy with how the lane performs, invite family and friends to bowl. You can even set up simple home tournaments or friendly leagues in your own backyard.
Do you know someone who would love this backyard bowling alley idea, too?
Click on any image to start the lightbox display. Use your Esc key to close the lightbox. ![]()

If you want more details, you can get step-by-step more instructions from Makgyver87 over at imgur…
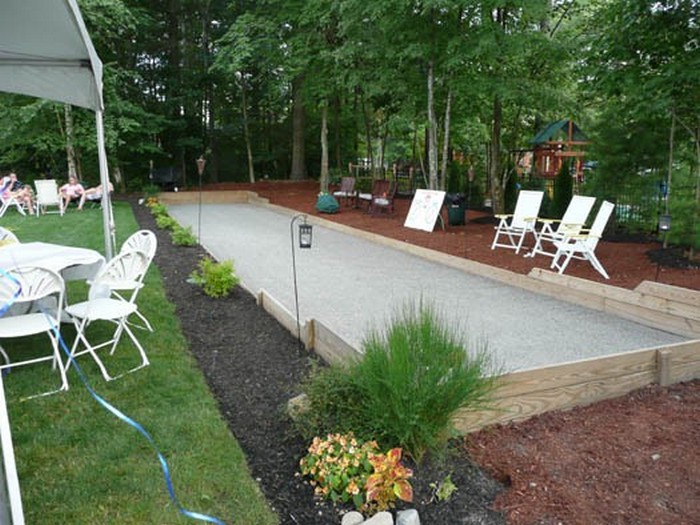
Seating and Spectator Areas for Your Backyard Bowling Alley
Comfortable seating makes your outdoor bowling alley more enjoyable for everyone.
- Choose outdoor friendly furniture
- Use weather resistant chairs, benches, or simple bleacher style seating.
- Pick pieces that you can move around easily so you can change the layout for bigger or smaller groups.
- Arrange for clear views
- Place seats along the side of the lane where people can see the pins and players.
- If you have enough space, consider slightly raised benches or low platforms for better views.
- Provide shade and shelter
- Add umbrellas, a canopy, or a small pergola near the seating area.
- Shade keeps guests comfortable during hot days and light rain.
- Add small comforts
- Include side tables for drinks and snacks.
- Place a scoreboard or whiteboard where everyone can see the scores.
- In cooler weather, outdoor heaters or blankets help extend your bowling season.
Thoughtful seating and spectator areas turn your backyard bowling alley into a true entertainment zone.
Lighting and Sound Systems
The right lighting and sound can change your backyard bowling alley from plain to special.
- Lane and pin lighting
- Place brighter lights directly over or beside the lane and pin area.
- LED strips or spotlights that point downwards work well and use less power.
- Keep lights high enough so that balls and pins do not hit them.
- Ambient lighting
- Use softer lights around seating and walking paths.
- Lanterns, wall lights, or gentle string lights create a relaxed and safe environment.
- Good ambient light reduces the risk of trips and falls.
- Music and sound
- Install weather resistant outdoor speakers.
- Place them so that sound is evenly spread and not blasting in one spot.
- A Bluetooth or wireless system makes it easy to play music from a phone.
- You can even add a simple microphone for fun announcements during games and homemade tournaments.
With a simple lighting and sound plan, your backyard bowling alley can feel like a small, private bowling venue.
Tips for Keeping Your Backyard Bowling Lane in Great Condition
Regular care will keep your DIY backyard bowling alley smooth and safe.
- Keep the surface clean
- Sweep or blow off leaves, dust, and small debris before games. This prevents small obstacles from changing the ball’s path.
- Check the frame and screws
- Every few weeks, look for loose screws, warped boards, or small cracks. Tighten and repair as needed.
- Protect against moisture
- If your lane is not covered, consider sealing the wood with outdoor rated sealant or paint.
Try not to let water sit on the lane for long periods.
- If your lane is not covered, consider sealing the wood with outdoor rated sealant or paint.
- Store balls and pins properly
- Keep balls and pins in a dry place when not in use. This helps them last longer and stay in good shape.
Simple, regular maintenance lets you enjoy your backyard bowling alley for many seasons.
What Surface Should You Use for a Backyard Bowling Alley?
Your choice of surface affects how the ball rolls and how much maintenance is required. Here are common options.
Natural Grass
Natural grass is the cheapest option and has a relaxed, lawn game feel.
- Pros
- Very low material cost
- Soft, natural look
- Cons
- Needs regular mowing and leveling
- Ball roll is less predictable
- Can get muddy after rain
Artificial Turf
Artificial turf is a popular middle ground for a backyard bowling alley.
- Pros
- Smooth and consistent
- Works in many weather conditions
- Less maintenance compared to real grass
- Cons
- Higher initial cost than grass
- Needs clean up to remove leaves and debris
Concrete or Pavers
Concrete and pavers provide a hard, flat surface that feels more like a professional lane.
- Pros
- Very flat and durable
- Consistent ball roll
- Long lasting with low maintenance
- Cons
- Highest cost and most work to install
- Hard surface if someone falls
- More permanent, not easy to remove
Think about your budget, yard style, and how serious you want the game to feel before you choose the surface for your backyard bowling lane.
FAQ: Outdoor Bowling Alley
- What types of balls can I use for a backyard bowling alley?
- You can use many kinds of balls outdoors. Foam or plastic balls are safe and light for children. Some families use soccer balls for a heavier and more challenging game. Smaller spaces can work well with tennis balls or rubber Playground balls.
- How long should a backyard bowling lane be?
- A full size lane from the foul line to the pins is 60 feet. In a backyard, many people choose lanes between 30 and 40 feet. Shorter lanes are easier to fit in small yards and are still fun for casual play.
- How much does it cost to build a backyard bowling alley?
- A basic DIY backyard bowling alley usually costs between 200 and 600 dollars. Using simple lumber, plywood, and a basic surface keeps costs lower. Adding laminate flooring, special lighting, or a permanent concrete base increases the total cost.
- How long does it take to build a DIY backyard bowling alley?
- Most people can build a basic lane in one weekend. Plan one day for building the frame and laying the base, and another day for installing the lane surface, lighting, and final details.
- What can I use as bumpers for a backyard bowling lane?
- For child friendly games, you can add bumpers such as pool noodles, PVC pipes, or narrow wooden planks along the sides of the lane. These help keep the ball from rolling off the edge and make the game more fun for beginners.
- Is a backyard bowling alley safe for kids?
- Yes, with a few simple rules. Make sure children do not stand in front of the pins or in the path of the ball. Store tools away after building. Use lighter balls for younger kids. Good lighting and a non-slip approach area also improve safety.
- What are the benefits of building your own backyard bowling alley?
- A home bowling lane gives you the freedom to play any time without lane fees or waiting times. You can design the alley to match your style and space. It turns your backyard into a fun gathering place for friends and family.
Conclusion
Creating your own backyard bowling alley provides countless hours of enjoyment as well as a special approach to gather friends and relatives. Careful design and appropriate materials will help you to create a unique, entertaining space that improves your outdoor living environment. A DIY bowling alley can save money on trips and give your house a unique touch so every game is a memorable occasion.
For more ways on making you backyard awesome, check out our rolling pipe slide project