Last Updated on November 21, 2025 by teamobn
Contents
- 1 Project Overview
- 2 Building Your Own Rolling Pipe Slide
- 2.1 What materials are needed to build a DIY Rolling Pipe Slide
- 2.2 What tools are needed to build this project?
- 2.3 How to Build a DIY Rolling Pipe Slide for Your Backyard?
- 2.3.1 Before you start: measurements and planning
- 2.3.2 Step 1: Prepare the Site
- 2.3.3 Step 2: Cut and Assemble the Frame
- 2.3.4 Step 3: Install Safety Rails
- 2.3.5 Step 4: Add Support Beams
- 2.3.6 Step 5: Install Angle Bracing
- 2.3.7 Step 6: Prepare the PVC Rollers
- 2.3.8 Step 7: Install Electrical Conduit (Axles) and Mount Rollers
- 2.3.9 Step 8: Final Checks and Finishing Steps
- 2.3.10 Step 9: Safety & Surfacing
- 3 Monthly Maintenance Checklist
- 4 Frequently Asked Questions About Building and Using a Rolling Pipe Slide
- 5 Conclusion
Project Overview
Build a durable, weather-resistant rolling-pipe slide in 9 easy steps — materials, tools, safety checks and a monthly maintenance plan included.
Key facts
- Estimated build time: 4–8 hours (one day project)
- Difficulty: Moderate (basic carpentry + drilling)
- Recommended age range: 3–10 years (supervise younger/less experienced kids)
- Surface: grass, mulch, or rubber safety matting recommended
- Maintenance: inspect monthly and after storms
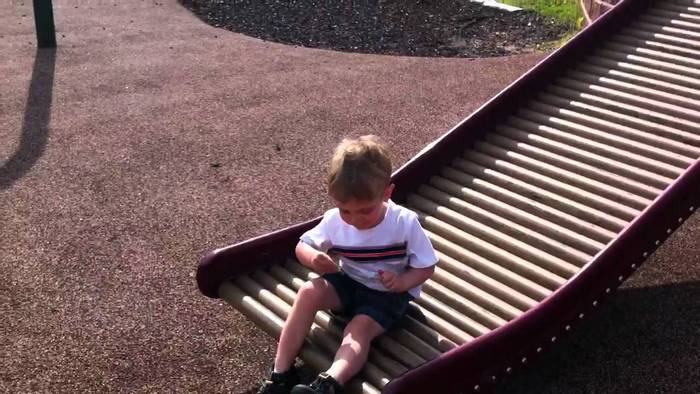
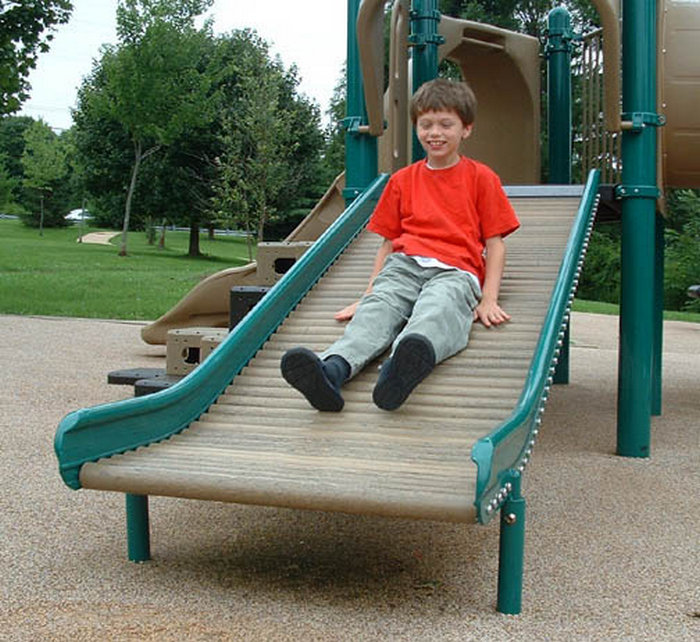
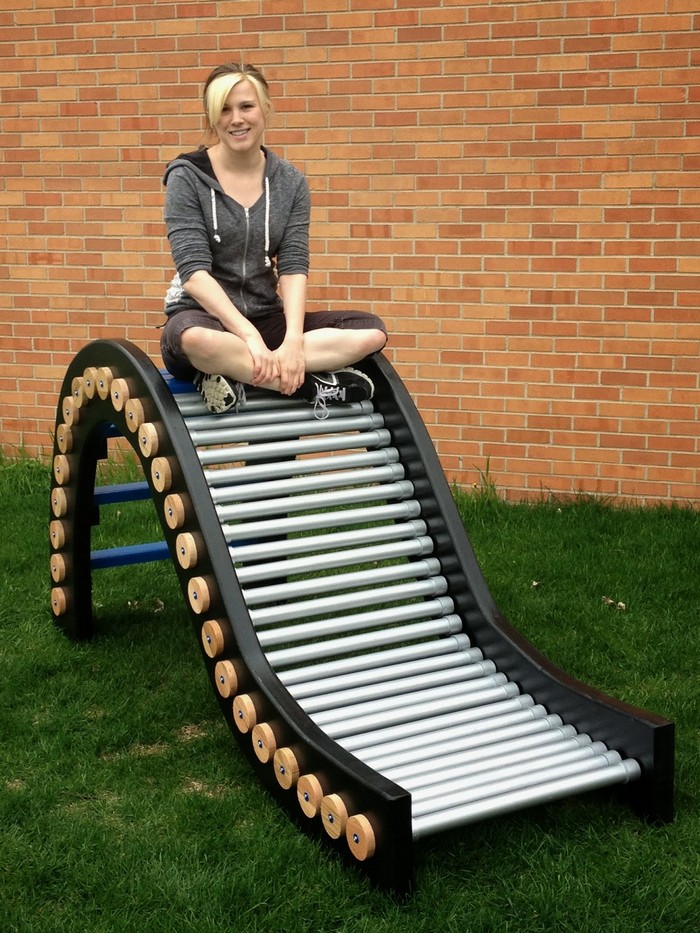
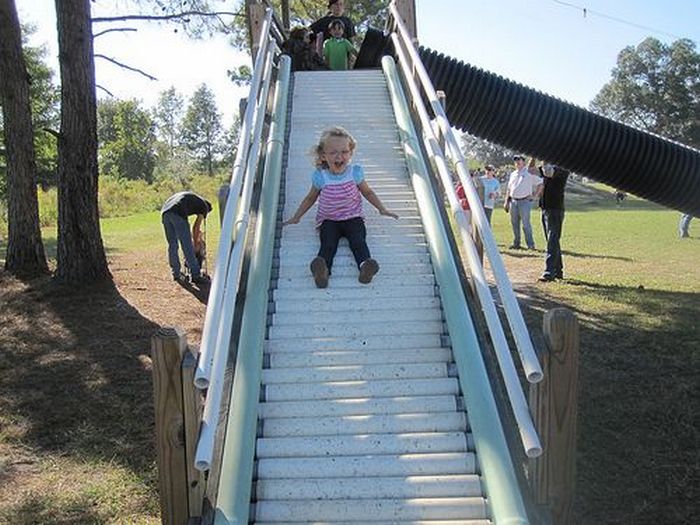
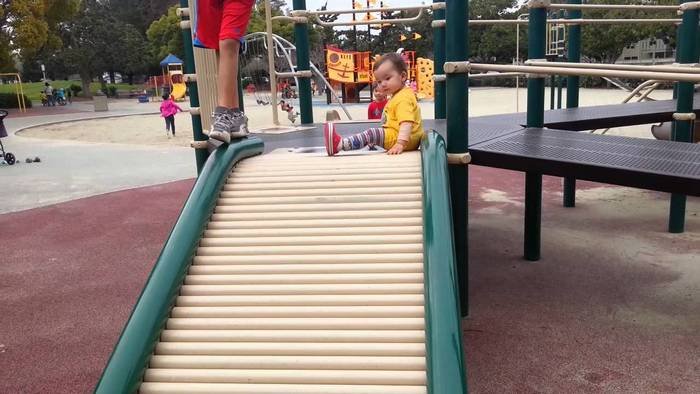
This rolling pipe slide is not the typical slide found in a typical playground, which makes it more fun! Its unique design means that it can be enjoyed by people of all ages, and it’s a great way to add some excitement to your playground.
As a parent, it is always important to find new and interesting activities for the kids. Not only does this help keep them occupied, but it also helps them to learn and grow. There are a lot of great resources out there for finding fun activities for kids, and I’m sure that other parents are always on the lookout for new ideas.
In our backyard, we have a sandpit, a tepee, and two rubber swings. All these were DIY projects my husband and I made two summers ago. My children were happy with them until they got bored. When I noticed that they didn’t play outside as much anymore, I had to do something. I decided to add some new elements to the backyard play area.
Since we didn’t have a slide yet, we knew we had to have one. We knew we needed a slide for the playground since we didn’t have one yet. It would be a great addition that the kids would enjoy for many years, no matter how tall they got. We wanted a slide that was durable and would last through all kinds of weather.
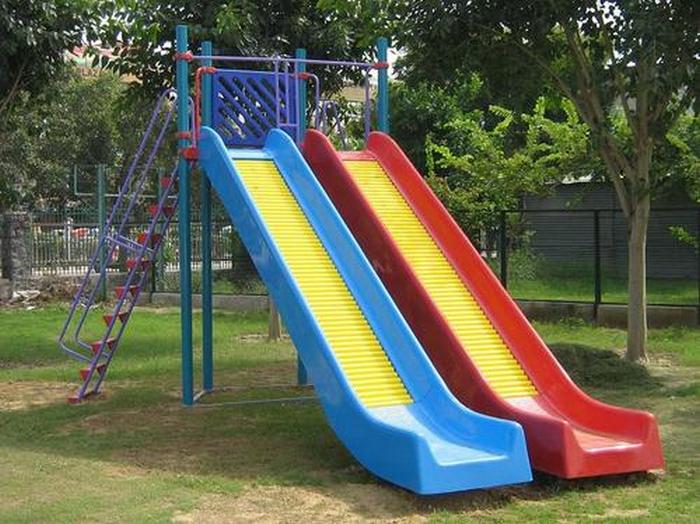
We found this great gem of an idea for a rolling pipe slide. It’s not the typical slide found in a typical playground but that makes it more fun! This particular rolling pipe slide is made out of PVC pipes, which makes it both sturdy and lightweight. It’s easy to set up and take down, which is great for busy families. Plus, it’s a great way to get kids moving and active.
Building Your Own Rolling Pipe Slide
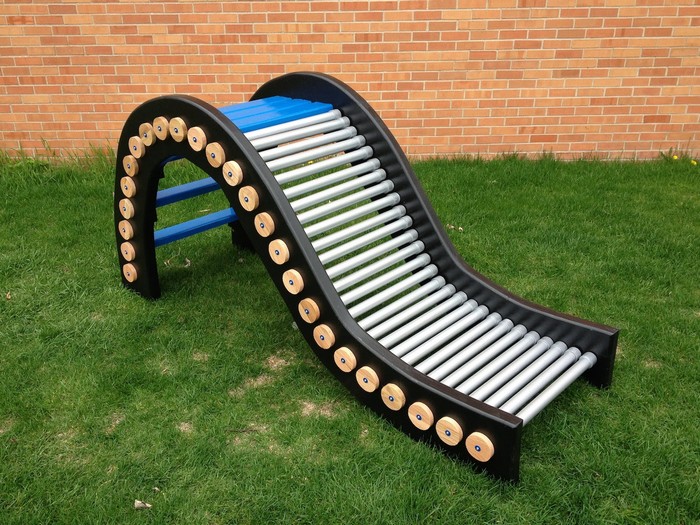
This rolling-pipe slide uses PVC tubes mounted on conduit to create a smooth, rolling surface kids love. It’s low-cost, customizable, and compact enough for many yards.
What are you waiting for? Start gathering them now and get started!
What materials are needed to build a DIY Rolling Pipe Slide
- 2 × 2″ x 10″ x 16′ — main side rails (long, lengthwise members)
- 2 × 2″ x 6″ x 16′ — safety/side-upstand rails
- 2–4 × 4″ x 4″ x 8′ — legs (2 for platform mount; add 2 more if freestanding)
- 4 × 2″ x 4″ x 8′ — support cross members / cleats
- 2 × 2″ x 6″ x 8′ — angle bracing at base
- 15 × 3″ PVC pipe, 10′ lengths (you’ll cut these into rollers) — 3″ PVC is a commonly used roller size
- Dome end caps for PVC (one per roller end)
- ½” electrical conduit (galvanized or EMT) to act as roller axles — cut to fit (choose corrosion-resistant)
- Stainless or galvanized fasteners: 3.5″ lag screws for rails to legs, 3″ outdoor wood screws for cross members, washers and locknuts for conduit stops
- Optional: nylon or polyethylene washers or small bearing bushings for the ends of each roller to reduce friction and wear
What tools are needed to build this project?
- Circular saw or miter saw (for lumber)
- Pipe cutter or saw for PVC and conduit
- Power drill + ¾” drill bit (ideally drill press for accurate, centered holes)
- Level, square, measuring tape, pencil, clamps
- Grinder or file (to deburr metal and conduit ends)
- Socket/driver for lag screws
Material choices and fastening:
- Use stainless or galvanized hardware for outdoor longevity.
- Use exterior-grade lumber or pressure-treated for parts in ground contact.
- Avoid lubricants on rollers where kids slide — they can stain clothing and create slippery hazards.
Click on any image to start the lightbox display. Use your Esc key to close the lightbox.

How to Build a DIY Rolling Pipe Slide for Your Backyard?
Before you start: measurements and planning
- Decide slide length and width.
- Common widths: 18″–24″. Length determines slope/height:
- Example: For a 6′ (72″) slide with 24″ width, determine how many rollers you want along the slide length.
- Roller length = slide width minus 3/8″–1/2″ overall clearance so rollers don’t bind against side rails. If width is 24″, cut rollers to 23-7/8″ or 23-1/2″.
- Roller spacing (center-to-center): aim for 1.5″–2.5″ depending on roller diameter and comfort. Closer spacing reduces chance of catching clothing; larger spacing needs larger-diameter rollers.
- Example: Slide length 72″ with 2″ center spacing → about 36 rollers.
- How many rollers per 10′ (120″) PVC length:
- Number per pipe = floor(120″ / roller_length). With 24″ rollers → 5 rollers per 10′ pipe.
- So 15 × 10′ pipes × 5 = 75 rollers — adjust based on your slide length and chosen spacing.
Step 1: Prepare the Site
- Choose a flat, open area, away from obstacles (fences, trees, patios) with a clear run-out at the bottom of at least 6–10 feet.
- Check ground surface: if not grass, plan to place rubber mats, wood chips or mulch under and around the slide landing zone.
- Mark the footprint with spray paint or stakes so you can visualize slope and actual placement before cutting wood.
Tips:
- Keep the slide facing a direction that avoids direct afternoon sun if possible (PVC can get hot).
- Check for underground utilities before driving any posts if you plan to bury legs.
Step 2: Cut and Assemble the Frame
- Cut 4×4 legs to your desired height. If attaching to an existing platform (deck), measure mounting height and adjust. If freestanding, cut legs so slope equals safe angle (approx 28°–35° depending on desired speed).
- Cut 2×10 side rails to full slide length. The two 2×10s are the long stringers that define the slide sides.
- Layout and pre-drill lag screw holes (helps prevent splitting). Use 3.5″ lag screws to fasten the 2×10s to the 4×4 legs. Use a square to make sure legs are perpendicular.
- During assembly, use clamps and a temporary bracing board to hold pieces square while you fasten.
Stability tips:
- If freestanding, consider burying legs 8–12″ or using galvanized post anchors bolted to concrete pavers for higher stability.
- Add a cross-brace at the top behind the legs and one midway down to prevent the legs from splaying.
Step 3: Install Safety Rails
- Cut and fasten 2×6 safety rails slightly above the top edge of the slide surface to act as guard-rails. They should be flush with the top of the 2×10 or slightly above it (creating a lip).
- Fasten with lag screws or carriage bolts spaced every 24–36″. These prevent falls and reduce the chance of clothes or limbs slipping over the side.
Tip:
- Round off the top edges with a sander to avoid sharp corners.
Step 4: Add Support Beams
- Install 2×4 cleats or support cross members between the inside faces of the two 2×10 stringers. Place these on the recommended centers (e.g., every 12–24″) depending on roller design. If your rollers span the width and sit on conduit supported at the side rails, you can alternatively place narrow cleats to locate conduit brackets.
- Secure supports with exterior wood screws. The support surface must be strong and stable — don’t skimp on fasteners.
Important: The support members must hold the conduit ends securely, and should not allow the conduit to flex or bow under load.
Step 5: Install Angle Bracing
- Attach diagonal bracing (cut 2×6s to fit) from the legs to the lower portion of the main rails to stop wobble and twisting. Use long screws and glue if desired.
- If the top end is freestanding, add cross-bracing between legs front-to-back and side-to-side.
Tip:
- Use carriage bolts at key structural junctions if you want removable, very strong connections.
Step 6: Prepare the PVC Rollers
- Cut PVC pipe into roller lengths equal to slide width minus clearance (see above). Use a fine-tooth blade or PVC cutter to make clean cuts. Deburr the inside and outside ends with a file.
- Mark the centerline along each roller so you can center the hole consistently. For consistent hole positions, build a simple jig: clamp the roller against a straight block so the drill bit is centered and drill with a steady hand or use a drill press.
- Drill a ¾” hole through the center of each roller for a ½” conduit axle (¾” hole gives clearance and allows a bushing if desired). Remove burrs and sand edges to prevent clothing snags.
- Fit domed end caps. To prevent the cap from working loose, either:
- Secure with a short stainless screw through the cap into the end of the PVC (pilot first), OR
- Use a small bead of exterior-grade adhesive (PVC cement) and a screw as backup.
- Consider using small nylon or polyethylene washers on the conduit between the roller ends and the side rails to act as bushings — this reduces friction and wear at the ends.
Tip:
- If you want a quieter, lower-friction solution, install inexpensive sleeve bearings (plastic bushings) on each end of the conduit where it passes through the stringers.
Step 7: Install Electrical Conduit (Axles) and Mount Rollers
- Cut the ½” conduit to length slightly longer than the slide width so you can trim and file the ends cleanly.
- Thread conduit through the drilled holes in all roller pieces. Slide rollers onto the conduit in the order you want them (use spacers if you want small gaps).
- Position the conduit so that the rollers sit on their support line and confirm they roll freely. Then secure the conduit ends to the side rails:
- Use conduit straps, small u-bolts or bearing blocks to hold the conduit at each end. Use washers and locknuts to create a “stop” so the conduit cannot slide side-to-side.
- Alternatively, drill a cross-hole near the exposed conduit end and use a short bolt or a cotter-pin style stop to keep the conduit from shifting.
Spacing guidance:
- Keep roller center-to-center spacing consistent — a simple spacer jig made from scrap leftover wood (e.g., a 2″ spacer block) speeds layout and keeps gaps uniform.
- Ensure rollers are close enough that clothing and fingers cannot get pinched between rollers. If uncertain, reduce gap.
Important: Make sure the conduit is supported near its midpoint if long — unsupported conduit can sag and cause rollers to bind.
Step 8: Final Checks and Finishing Steps
- Walk the slide with an adult weight sitting and sliding slowly (crouch down and test). Listen for binding, creaks or wiggle.
- Tighten and re-check lag screws, fasteners and conduit stops. Ensure end caps are secure and not likely to pop off.
- Sand any rough wood edges, apply a weatherproof finish to the wood (exterior paint or stain), and apply anti-splinter sanding to the slide edges.
Testing protocol:
Start with low-load tests (an adult sits gently), then increase load. Check roller rotation under load. Inspect for movement in the frame or axle shift after each test.
Step 9: Safety & Surfacing
- Place soft surfacing under the slide run-out: 6–12 inches of wood chips, rubber surfacing, or thick grass lawn. Keep the landing zone clear of hard objects.
- Post a simple sign or sticker with rules: one child at a time, no standing, age recommendation, adult supervision required.
- Make sure handholds and steps up to the slide are secure and non-slip. Add a toe-board or small barrier at the top so kids do not step directly onto the rollers.
Monthly Maintenance Checklist
- Tighten all fasteners; check for rusted hardware.
- Spin each roller by hand — replace cracked or sticky rollers.
- Check wood for rot, splits or termite damage; repair or replace as necessary.
- Check conduit for bending or corrosion; replace if compromised.
- Re-apply finish to wood every 1–3 years depending on exposure.
Common Problems and Fixes
- Rollers bind or don’t turn: check that conduit is straight and supported, that center holes are centered and deburred, and that spacers aren’t too tight. Add nylon washers/bushings to isolate roller ends from the frame.
- Clothing catches between rollers: reduce gap, increase number of rollers, or add a top lip/guard at the beginning of the slide to keep clothing clear of end gaps.
- Structure wobbles: add diagonal bracing, use longer/brighter fasteners, or anchor legs into the ground with concrete or post anchors.
- End caps pop off: secure caps with a screw or use adhesive + screw combo.
Optional Upgrades
- Install small plastic or nylon bushings or sleeve bearings at roller ends for smoother rotation and less wear.
- Add a small weatherproof cover for the top when not in use to reduce UV damage to PVC.
- Add lightweight foam padding near sharp corners and at the run-out for extra safety.
- Use stainless or galvanized conduit and hardware for longer life in wet climates.
Frequently Asked Questions About Building and Using a Rolling Pipe Slide
- How difficult is it to build a rolling pipe slide?
- Building a rolling pipe slide is a moderately challenging DIY project. It requires basic carpentry skills and adherence to safety guidelines. The difficulty level depends on your experience with similar projects.
- What is the recommended age range for children using the rolling pipe slide?
- The slide is generally suitable for children aged 3 to 10 years. However, it’s important to consider the individual abilities and confidence levels of each child.
- Can the slide be modified for smaller children?
- Yes, the slide can be modified. You can adjust the height and the steepness to make it more suitable for younger children. Always prioritize safety in any modifications.
- How often should the slide be inspected for safety?
- Inspect the slide thoroughly at least once a month and after any extreme weather conditions. Regularly check for loose screws, cracks, or any signs of wear.
- What maintenance does the rolling pipe slide require?
- Regular maintenance includes tightening loose screws, replacing worn-out parts, and ensuring the PVC pipes roll smoothly. Also, keep the slide clean and free from debris.
- Is adult supervision always necessary?
- Yes, adult supervision is crucial, especially for younger children. It ensures safety and helps prevent accidents.
- What kind of surface is best to place under the slide?
- Install the slide over a soft surface like grass, rubber mats, or mulch. These surfaces provide cushioning and reduce the risk of injury.
- Can the slide be left outside year-round?
- Yes, but it’s important to use weather-resistant materials. Also, consider additional protection like covers during extreme weather.
- How much space is needed for the slide?
- Ensure enough clear space around the slide for safe play. Include extra space at the bottom for children to exit the slide without obstacles.
Conclusion
Building a rolling pipe slide is a rewarding project that brings endless joy and developmental benefits to children. By following the steps outlined, using the right materials and tools, and adhering to safety measures, you can create a fun and secure play area in your backyard. Regular maintenance and supervision ensure the slide remains a safe and enjoyable space for children to develop their physical, cognitive, and social skills.