Last Updated on December 19, 2025 by teamobn
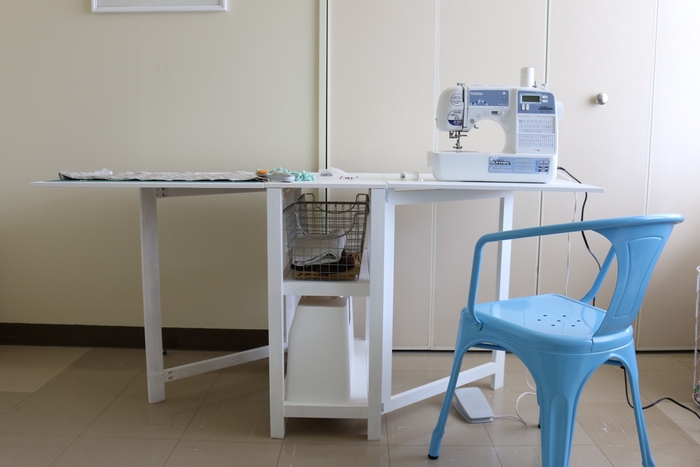
Do you want a craft space but do not have room for a full-time table? A foldable craft table can solve that problem. It gives you a large work surface when you need it and folds away when you are done.
This project shows you how to build a foldable craft table with a work surface of about 66 by 26 inches and built-in storage. It is designed for small homes, apartments, and multipurpose rooms where you need to save floor space. You can roll it out when you want to craft and push it away when you are finished.
If you prefer to buy instead of build, you can also compare this plan with ready-made foldable work tables to see which option fits your space and budget.
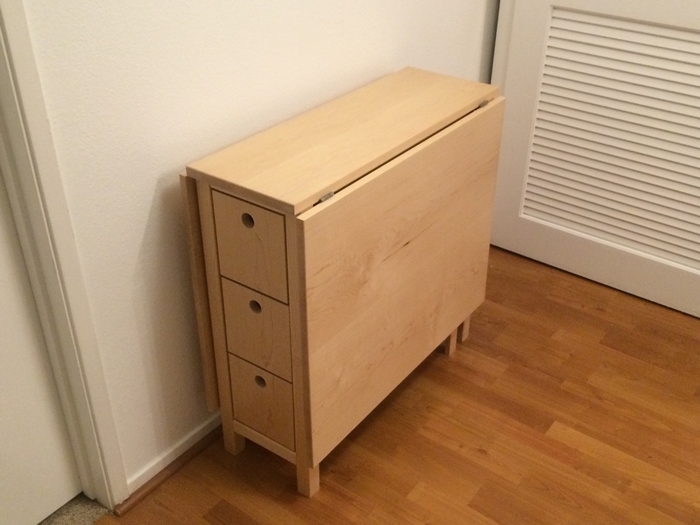
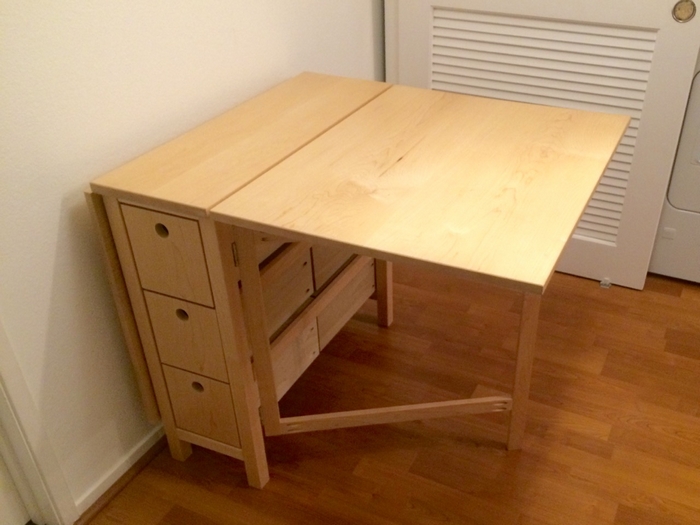
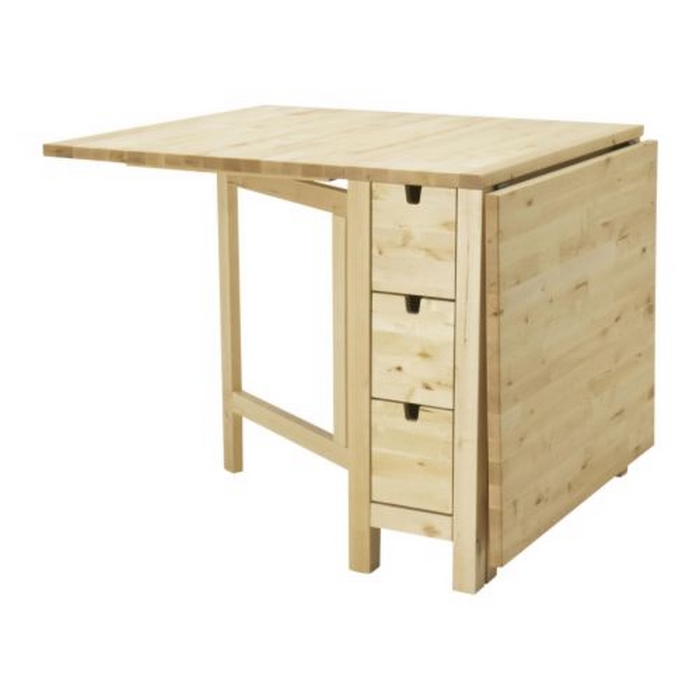
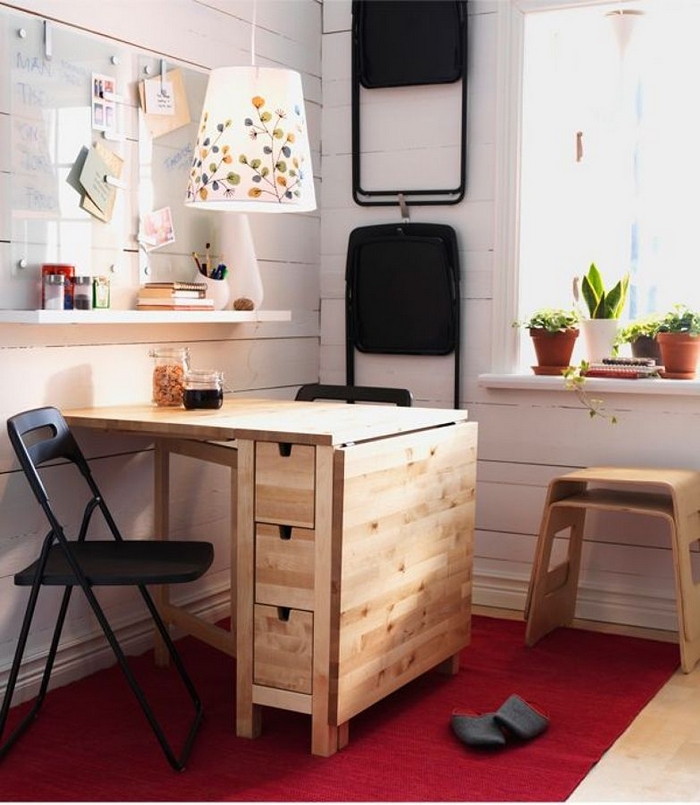
This design is similar in concept to Ikea’s NORDEN gateleg table. The sides fold down, and the center section holds storage shelves. When folded, it takes up very little space but still feels sturdy and solid when opened.
Use this project if you want a space-saving craft table with:
- A generous work surface
- Built-in shelves for supplies
- Optional wheels for easy movement
- A design that can double as a small workbench, sewing table, or cutting table
Before you start, review the tools and materials and read through all the steps once. This will help you understand how the table works and how the folding parts fit together.
Contents
- 1 Project At A Glance
- 2 Building a Folding Table
- 2.1 What Are the Materials Needed to Build a Folding Table
- 2.2 Step by step: How to build a DIY foldable craft table
- 2.2.1 Step 1: Build the table leg frames
- 2.2.2 Step 2: Build the center storage box
- 2.2.3 Step 3: Add shelf supports and install shelves
- 2.2.4 Step 4: Build the tabletop sections
- 2.2.5 Step 5: Attach hinges for the folding wings
- 2.2.6 Step 6: Connect the tabletop to the base
- 2.2.7 Step 7: Attach leg supports and small hinges
- 2.2.8 Step 8: Add casters and stoppers (optional)
- 2.2.9 Step 9: Sand and finish the table
- 2.2.10 Step 10: Test and adjust
- 3 Benefits of a Foldable Craft Table
- 4 The Wrap Up
Project At A Glance
- Difficulty: Intermediate DIY (comfortable using saws and a drill)
- Time: About 1 to 2 days, depending on your experience
- Cost: Varies with wood type and hardware
- Finished size: About 66 inches long by 26 inches wide by 29 and a half inches high
- Best for: Small craft rooms, apartments, multipurpose rooms, or any space where a permanent table is not possible

Building a Folding Table
What Are the Materials Needed to Build a Folding Table
These measurements are for the version shown in this tutorial. You can adjust them if you want a smaller or larger table, but keep the proportions similar so it stays stable and easy to fold.
Table Base
- 4 pieces 1 1/2 inch by 1 1/2 inch by 29 inch table legs
- 4 pieces 1 1/2 inch by 9 3/4 inch by 3/4 inch support boards for front and back
- 6 pieces 1 1/2 inch by 23 1/2 inch by 3/4 inch support boards for the sides
- 2 pieces 26 1/2 inch by 26 1/2 inch by 1/2 inch plywood for the folding tabletop sections
(you can also use 3/4 inch plywood for extra strength) - 1 piece 13 1/4 inch by 26 1/2 inch by 1/2 inch plywood for the center tabletop section
(3/4 inch plywood is also fine here)
Frame Boards
- 2 pieces 2 inch by 29 inch by 3/4 inch
- 2 pieces 1 1/2 inch by 26 1/2 inch by 3/4 inch
- 4 pieces 1 1/2 inch by 19 7/8 inch by 3/4 inch
These boards form the outer frame that supports the tabletop and the folding wings.
Shelving
- 8 pieces 3/4 inch by 3/4 inch by 8 inch (cleats to hold the shelves)
- 2 pieces 24 3/4 inch by 9 3/4 inch by 1/2 inch (shelves)
Hardware
- 4 pieces 3 to 4 inch door hinges for the folding tabletop sections
- 4 pieces 1 inch door hinges for the legs or smaller panels
- 4 pieces 1 inch corner or L shaped hinges for extra support
- 1 1/2 inch wood screws
- 4 wheel casters (optional, for a rolling craft table)
- 2 door stoppers (optional, to keep legs from folding by accident)
- Paint, stain, or clear sealer (optional finish)
- Edging tape for plywood edges (optional, for a cleaner look)
Tools
- Screwdriver or drill driver
- Kreg Jig or pocket hole jig (optional but helpful)
- Household iron for edging tape
- Miter saw for accurate cross cuts
- Table saw or circular saw for ripping boards and cutting plywood
- Sander and sandpaper
You do not need professional grade equipment. A basic circular saw, drill, and sander are usually enough. The Kreg Jig makes stronger joints, but you can also build this project using regular wood screws and careful pre drilling.
Click on any image to start the lightbox display. Use your Esc key to close the lightbox.![]()


Safety Tips
- Wear safety glasses and hearing protection when cutting or sanding wood
- Clamp boards securely before cutting
- Keep hands well away from saw blades and bits
- Double check measurements before you cut, especially for legs and tabletop parts
- Work on a stable surface and do not rush

Step by step: How to build a DIY foldable craft table
Step 1: Build the table leg frames
In this step you will build the basic leg frames that support the table.
- Lay out two 29 inch legs on a flat surface.
- Attach a 2 inch by 29 inch frame board across the top ends of the legs using wood screws. This forms a U shaped frame.
- Repeat for the other two legs so you have two identical leg frames.
- Attach the 1 1/2 inch by 9 3/4 inch support boards near the bottom of each pair of legs, one in front and one in back. These boards help keep the legs from wobbling.
Make sure both frames are square and the legs are the same length so the table will sit level.
Step 2: Build the center storage box
The center section of the table holds shelves and supports the folding wings.
- Use the 1 1/2 inch by 23 1/2 inch side support boards and the 1 1/2 inch by 9 3/4 inch front and back support boards to form a rectangular box between the two leg frames.
- Attach the boards using screws or pocket hole joints.
- Check that the width matches the 13 1/4 inch center tabletop piece so the top will sit flush later.
This frame will hold the shelves and also act as the main support under the middle of the table.
Step 3: Add shelf supports and install shelves
Now you will add storage shelves inside the center section.
- Decide how high you want your shelves. Many people like one shelf about halfway up and one lower shelf for heavier items.
- Mark the height on the inside of the center frame.
- Attach the 3/4 inch by 3/4 inch by 8 inch shelf cleats along those marks on both sides, using screws. Make sure they are level and straight.
- Rest the 24 3/4 inch by 9 3/4 inch shelf boards on the cleats.
- Secure the shelves to the cleats with a few screws from underneath or the sides.
These shelves are perfect for storing paints, glue, yarn, patterns, and other craft supplies so they are always close by.
Step 4: Build the tabletop sections
The tabletop has three main pieces. The center piece stays in place, and the two outer wings fold up and down.
- Place the 13 1/4 inch by 26 1/2 inch center tabletop board on top of the center frame, centered from side to side. It should cover the storage box evenly.
- Secure it with screws from above or from underneath through the frame.
- Place one 26 1/2 inch by 26 1/2 inch tabletop board on each side of the center piece. These will be the folding wings. Do not screw them down yet.
Check that all three pieces line up smoothly and create a flat surface when open.
Step 5: Attach hinges for the folding wings
The hinges let the side panels fold down when not in use.
- Turn the tabletop pieces upside down or lift them so you can reach the underside.
- Position 3 to 4 inch door hinges along the seam where one wing meets the center board. Space them evenly.
- Attach the hinges using appropriate screws. Make sure the hinge pins line up in a straight line so the wing moves smoothly.
- Repeat for the other side wing.
Test each wing to ensure it folds down and up without binding. Adjust the hinge position if needed.
Step 6: Connect the tabletop to the base
Now you will join the tabletop assembly to the leg and center frame.
- Place the leg and center frame on a flat surface.
- Set the tabletop (center and wings already hinged) on top of the frame.
- Align the center board over the center storage box.
- Attach the underside of the center board to the frame using screws.
- Add the 1 1/2 inch by 26 1/2 inch frame boards and the 1 1/2 inch by 19 7/8 inch boards where needed to tie the top and base together and to support the edges under the folding wings.
The goal is to create solid support under the center and enough edge support so the wings do not sag when open.
Step 7: Attach leg supports and small hinges
The foldable legs under the wings support the tabletop when it is open.
- Decide how you want the legs to fold. Many people let the legs swing out and lock under the wing when it is raised.
- Use the 1 inch door hinges or corner hinges to attach the legs to the underside of the wings or to small mounting blocks under the wings.
- Test the movement so the legs fold in neatly when the wing is down and swing out straight when the wing is up.
- Add 1 inch corner hinges or brackets where needed for extra strength at stress points.
Take your time here. A smooth, solid leg action is what makes the table feel safe and stable.
Step 8: Add casters and stoppers (optional)
If you want a mobile craft table, add wheel casters.
- Flip the table carefully on its side or back.
- Attach one caster to the bottom of each leg using the provided screws.
- Use locking casters if possible so the table does not roll while you work.
- Install door stoppers or simple blocks inside the frame if you want a hard stop to keep the legs from folding in too far or too easily.
Casters make it easy to roll the table into a corner, closet, or against a wall when not in use.
Step 9: Sand and finish the table
Proper sanding and finishing improve both the look and the durability of your table.
- Fill nail holes and small gaps with wood filler and allow it to dry.
- Sand all surfaces with 120 to 150 grit sandpaper to remove rough spots.
- Follow with 220 grit sandpaper for a smooth finish, always sanding with the grain of the wood.
- Apply edging tape to raw plywood edges if you want a cleaner appearance. Use a household iron to activate the glue, then trim the excess and sand lightly.
- Wipe away dust with a damp cloth.
- Apply paint, stain, or clear sealer according to the product instructions. Add at least two coats for a surface that will handle glue, paint, and cutting mats.
Let the finish dry completely before using the table for crafting.
Step 10: Test and adjust
Open and close the table several times and make sure everything works as you expect.
- Test both folding wings
- Check that the legs lock firmly and the tabletop feels stable
- Confirm that the casters roll and lock correctly if you installed them
- Load the shelves with supplies and make sure nothing gets in the way of the folding action
If something sticks, squeaks, or feels loose, tighten the screws or adjust the hinge positions until everything moves smoothly.r crafting needs. Adjust measurements and materials as needed to fit your preferences. Enjoy your new crafting space!
Benefits of a Foldable Craft Table
A DIY foldable craft table offers many advantages, especially if you work in a small space.
- Fun Project
- Building this table can be enjoyable, especially if you work with a friend or family member. You end up with a useful, attractive piece of furniture and a shared experience.
- Space Saving
- You can fold the wings down and roll or push the table out of the way when you are not crafting. This frees up floor space in small rooms, apartments, or shared living areas.
- Custom Fit
- When you build your own table, you can choose the overall size, height, and number of shelves. You can make it tall for standing work, lower for sewing, or narrow to fit a certain wall.
- Cost Control
- Building your own table is often cheaper than buying a high quality foldable craft table. You can save money by using leftover lumber or repurposing materials from other projects.
- Skill Building
- This project helps you practice measuring, cutting, drilling, and installing hinges. It is a good next step if you already have some basic woodworking skills and want to improve.
- Personal Style
- You can choose paint, stain, and hardware that match your room. You can make a bright, colorful craft station or a simple, natural wood table.
- Versatility
- A foldable craft table can serve as a craft station, sewing table, cutting surface, homework space, or even a temporary dining surface for small gatherings.
- Sustainability
- If you choose responsibly sourced wood and durable hardware, you can keep this table in use for many years. This can be more environmentally friendly than replacing low quality furniture often.
- Easy to Update
- If your needs change, you can add more shelves, hooks for tools, or even lighting above the table. Since you built it, you know how everything fits together.
- Satisfaction
- There is a special feeling that comes from using a piece of furniture you built yourself. Every time you fold the table out and start a project, you are using your own craftsmanship.
Pro Strategies: Building a Foldable Craft Table
- Space-conscious Design Planning
- Start by carefully measuring your available space and crafting a design that optimizes every inch, ensuring the table fits seamlessly into your room.
- Utilize Wall Space
- Consider mounting the foldable craft table directly onto a wall to free up valuable floor space when not in use. This also provides stability and support for the table when extended.
- Incorporate Storage Options
- Integrate storage solutions such as shelves, cubbies, or drawers into the design of the craft table to keep supplies organized and within easy reach while minimizing clutter in the room.
- Foldable Extension Wings
- If space allows, include foldable extension wings on either side of the table to provide additional workspace when needed and fold them down to save space if you prefer.
- Choose Lightweight Materials
- Opt for lightweight yet sturdy materials for the tabletop and frame to ensure easy folding and unfolding while maintaining durability. Additionally, consider features like reinforced joints or locking mechanisms to further enhance the stability and longevity of the folding table.
- Investing in quality materials and construction ensures that your folding table remains a reliable and convenient option for various purposes, whether it’s for indoor gatherings, outdoor events, or workspace setups.
- Hidden Hardware
- Effortlessly achieve a minimalist and polished look by ingeniously concealing hinges, brackets, and any other necessary hardware within the inner framework of the table. This meticulous attention to detail ensures a seamless and streamlined appearance when the table is neatly folded away, enhancing both its functionality and visual appeal.
- Multipurpose Functionality
- Design the craft table to serve multiple purposes, such as a work surface, cutting area, and storage solution, to maximize its utility and minimize the need for additional furniture.
- Customizable Configuration
- Make a modular design that allows you to adjust the height, angle, or layout of the table to suit different crafting projects and personal preferences.
- Easy Assembly and Disassembly
- Ensure that the craft table can be easily assembled and disassembled without the need for specialized tools, making it convenient to store or transport as needed.
- Test and Refine
- Once the craft table is built, test its functionality and make any necessary adjustments to ensure it meets your space-saving needs while providing a practical and efficient workspace.
The Wrap Up
Building a foldable craft table is a practical and space-saving solution for individuals seeking to maximize their workspace efficiency. Through the ten outlined steps, we have detailed a systematic approach to creating a versatile and functional craft table that can adapt to various needs and spatial constraints.
Firstly, by selecting suitable materials and tools, we ensure the durability and stability of the final product. Then, through precise measurements and cutting, we craft the components necessary for the table’s construction. Assembling these pieces systematically and securely reinforces the table’s structural integrity.
Incorporating hinges and support mechanisms enables effortless folding and unfolding, enhancing convenience and usability. Additionally, the inclusion of storage options such as shelves or drawers further optimizes space utilization, allowing for the organization of crafting supplies and materials.
Throughout the construction process, attention to detail and adherence to safety protocols are paramount to ensure a high-quality, reliable result. By following these steps diligently, craft enthusiasts can enjoy a functional workspace.
Ultimately, the foldable craft table serves as a testament to the ingenuity and resourcefulness of DIY enthusiasts, offering a customizable solution that caters to individual preferences and spatial constraints. Whether utilized for hobbyist pursuits or professional endeavours, this versatile furniture piece proves invaluable in maximizing productivity and creativity within limited living or working environments.
If you enjoyed building this foldable craft table and want to try something sturdier, check out our wall-mounted folding workbench plans — perfect for garages, workshops, or multipurpose creative spaces.

Frequently Asked Questions
- How much weight can a foldable craft table support?
- A typical DIY foldable craft table like this one is designed for light to medium loads such as fabric, paper, paints, and small tools. With solid plywood and good hinges, it should comfortably hold about 30 to 50 kilograms or 65 to 110 pounds spread over the surface. If you plan to place very heavy machines or tools on it, use thicker plywood, stronger hinges, and extra supports under the wings.
- Are foldable craft tables easy to assemble
- Yes. Most foldable craft tables are designed to be straightforward to assemble. If you follow the step by step instructions, measure carefully, and take your time with the hinges and legs, you can build this project with basic DIY skills. Reading through the whole guide before you begin will make the process smoother.
- Can a foldable craft table be adjusted to different heights
- Many commercial foldable tables do not offer height adjustment, but you can design your DIY table to suit your needs. For example, you can choose leg length that matches a standard desk height for sitting or a higher bench height for standing. If you need true adjustability, you can explore adjustable leg hardware or design removable leg extensions.
- What materials are best for a foldable craft table
- Common materials include plywood, solid wood, and metal hardware. Plywood is a good choice for the tabletop because it is stable and comes in large sheets. Solid wood works well for legs and frames. Choose hinges and screws that are strong and rust resistant. Finish the table with paint, stain, or clear sealer to protect it from spills and wear.
- How do you clean and maintain a foldable craft table
- Most of the time, you can clean the surface with a damp cloth and mild soap. Avoid harsh chemicals or very abrasive pads that may scratch or damage the finish. Wipe up paint, glue, or water quickly. Check the hinges and screws every few months and tighten them if they loosen. If the finish wears down over time, lightly sand and apply a fresh coat of paint or sealer.
- Can you use a foldable craft table outdoors
- Some folding tables are suitable for outdoor use, but this depends on the materials. For outdoor use, choose weather resistant finishes and hardware, such as treated wood, rust resistant metal, or outdoor rated paint. If you use the table outside, try to keep it under cover and store it indoors when not in use to extend its life.
- Do foldable craft tables come with storage options
- Many foldable craft tables, including this design, include built in shelves or compartments. The shelves in the center section keep tools and supplies organized and easy to reach. You can add more storage by using bins, baskets, or drawer inserts, or by mounting hooks and holders on the sides. use a 1/2-inch round-over router bit to soften the top and bottom edges of the tabletop for a polished finish. Apply the same technique to all four edges of each table leg for a cohesive look and added safety. This step enhances the design and highlights the craftsmanship of your table.